Quick start
The local cluster setup on a single host is intended for development and learning. For production deployment, performance benchmarking, or deploying a true multi-node on multi-host setup, see Deploy YugabyteDB.
Install YugabyteDB
Installing YugabyteDB involves completing prerequisites and then performing the actual installation.
Note that the Docker option to run local clusters is recommended only for advanced Docker users. This is due to the fact that running stateful applications such as YugabyteDB in Docker is more complex and error-prone than running stateless applications.
Prerequisites
Before installing YugabyteDB, ensure that you have the Docker runtime installed on your localhost. To download and install Docker, select one of the following environments:
Install
Pull the YugabyteDB container by executing the following command:
docker pull yugabytedb/yugabyte:2.17.3.0-b152
Create a local cluster
To create a 1-node cluster with a replication factor (RF) of 1, run the following command:
docker run -d --name yugabyte  -p7000:7000 -p9000:9000 -p5433:5433 -p9042:9042\
 yugabytedb/yugabyte:2.17.3.0-b152 bin/yugabyted start\
 --daemon=false
If you are running macOS Monterey, replace -p7000:7000 with -p7001:7000. This is necessary because Monterey enables AirPlay receiving by default, which listens on port 7000. This conflicts with YugabyteDB and causes yugabyted start to fail unless you forward the port as shown. Alternatively, you can disable AirPlay receiving, then start YugabyteDB normally, and then, optionally, re-enable AirPlay receiving.
Run the following command to check the cluster status:
docker ps
CONTAINER ID        IMAGE                 COMMAND                  CREATED             STATUS              PORTS                                                                                                                                                                     NAMES
5088ca718f70        yugabytedb/yugabyte   "bin/yugabyted start…"   46 seconds ago      Up 44 seconds       0.0.0.0:5433->5433/tcp, 6379/tcp, 7100/tcp, 0.0.0.0:7000->7000/tcp, 0.0.0.0:9000->9000/tcp, 7200/tcp, 9100/tcp, 10100/tcp, 11000/tcp, 0.0.0.0:9042->9042/tcp, 12000/tcp   yugabyte
Clients can now connect to the YSQL and YCQL APIs at http://localhost:5433 and http://localhost:9042 respectively.
Run Docker in a persistent volume
In the preceding docker run command, the data stored in YugabyteDB does not persist across container restarts. To make YugabyteDB persist data across restarts, you can add a volume mount option to the docker run command, as follows:
-
Create a
~/yb_datadirectory by executing the following command:mkdir ~/yb_data -
Run Docker with the volume mount option by executing the following command:
docker run -d --name yugabyte \
         -p7000:7000 -p9000:9000 -p5433:5433 -p9042:9042 \
         -v ~/yb_data:/home/yugabyte/yb_data \
         yugabytedb/yugabyte:latest bin/yugabyted start \
         --base_dir=/home/yugabyte/yb_data --daemon=false
If running macOS Monterey, replace
-p7000:7000with-p7001:7000.
Use the Admin UI
The cluster you have created consists of two processes: YB-Master which keeps track of various metadata (list of tables, users, roles, permissions, and so on) and YB-TServer which is responsible for the actual end user requests for data updates and queries.
Each of the processes exposes its own Admin UI that can be used to check the status of the corresponding process, as well as perform certain administrative operations. The yb-master Admin UI is available at http://localhost:7000 and the yb-tserver Admin UI is available at http://localhost:9000. To avoid port conflicts, you should make sure other processes on your machine do not have these ports mapped to localhost.
Overview and YB-Master status
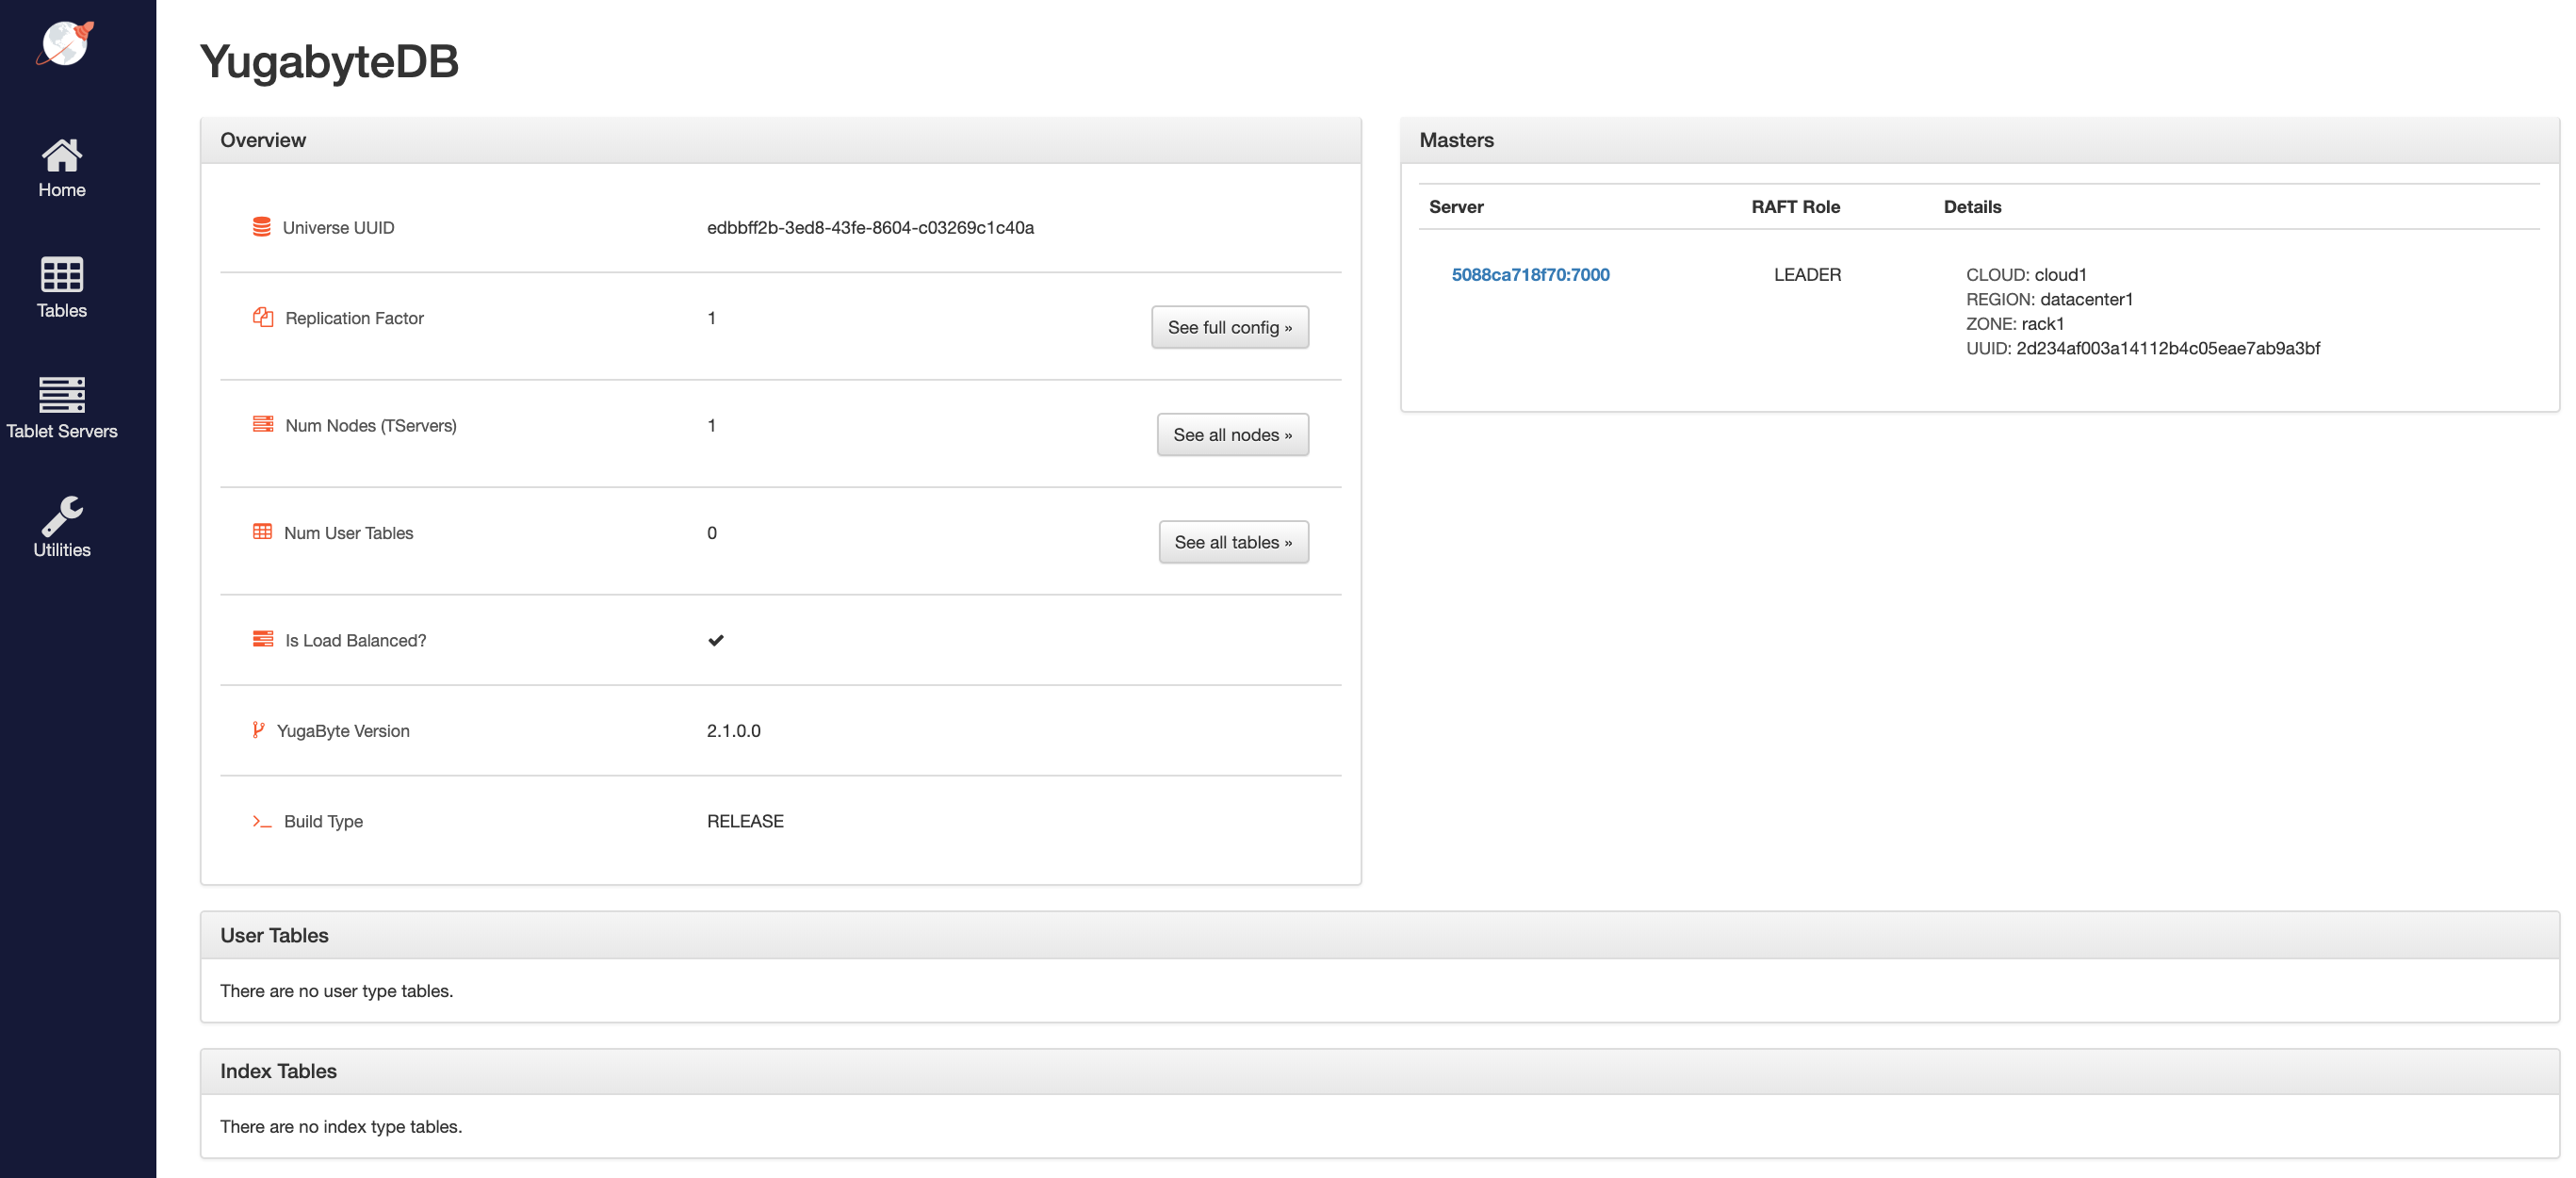
The following illustration shows the YB-Master home page with a cluster with a replication factor of 1, a single node, and no tables. The YugabyteDB version is also displayed.

The Masters section shows the 1 YB-Master along with its corresponding cloud, region, and zone placement.
YB-TServer status
Click See all nodes to open the Tablet Servers page that lists the YB-TServer along with the time since it last connected to the YB-Master using regular heartbeats, as per the following illustration:

Connect to the database
Using the YugabyteDB SQL shell, ysqlsh, you can connect to your cluster and interact with it using distributed SQL. ysqlsh is installed with YugabyteDB and is located in the bin directory of the YugabyteDB home directory.
To open the YSQL shell, run ysqlsh.
$ docker exec -it yugabyte /home/yugabyte/bin/ysqlsh --echo-queries
ysqlsh (11.2-YB-2.1.0.0-b0)
Type "help" for help.

yugabyte=#
To load sample data and explore an example using ysqlsh, refer to Retail Analytics.