Connect Hasura Cloud to YugabyteDB Managed
Use the Hasura GraphQL Engine with YugabyteDB Managed to power your GraphQL applications with a distributed SQL database.
This page describes how to connect a YugabyteDB Managed cluster to a Hasura Cloud project.
For an example of how to deploy a GraphQL application for a Hasura Cloud project connected to YugabyteDB Managed, refer to Deploy a GraphQL application.
Obtain your Yugabyte cluster connection info
Sign up for YugabyteDB Managed and create a Sandbox cluster by following the steps in the Quick Start.
The cluster has a default database called yugabyte. You'll use this along with your database credentials (username and password) in your connection with the Hasura project. To connect, you'll also need the connection string with the cluster's host address and port number.
To get these details, in YugabyteDB Managed:
-
On the Clusters page, select the cluster you will use for the application, and click Connect.
-
Click Connect to your Application.
-
Select Optimize for Hasura Cloud.
-
Copy and record the YSQL connection string, replacing
<DB USER>and<DB PASSWORD>with your cluster database credentials.
Important
The connection string is a URL; be sure to encode any special characters in the hostname or password of the connection string.Create a Hasura Cloud project
To create a Hasura Cloud account, sign up at https://cloud.hasura.io.
For details on using Hasura Cloud, refer to the Hasura Cloud documentation.
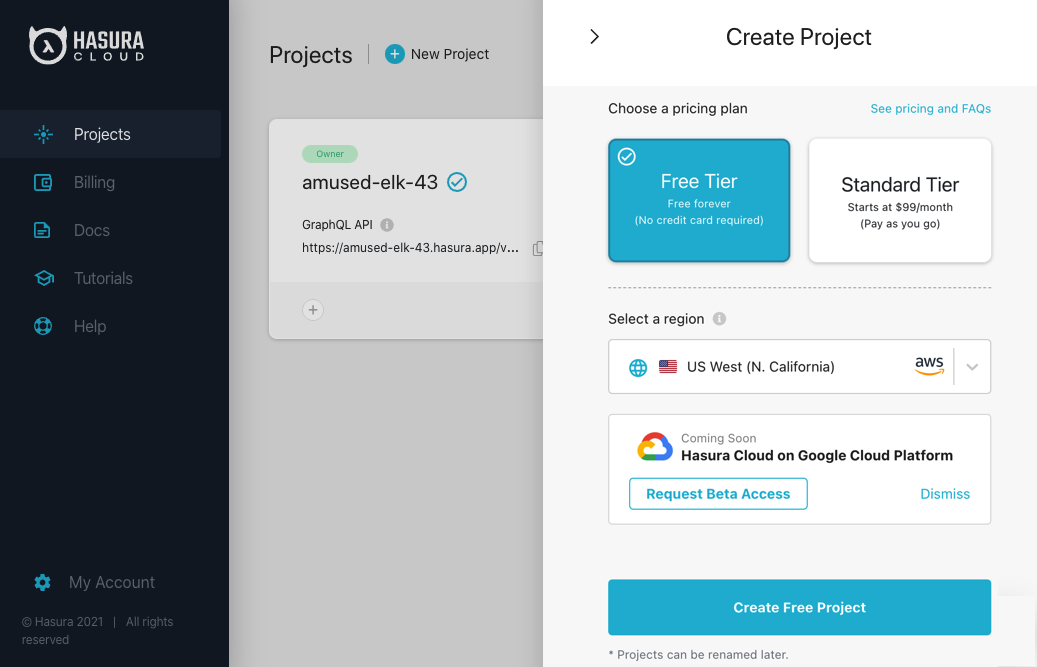
To create a project in Hasura Cloud:
-
From the Hasura Cloud Dashboard, under Projects, click New Project.
-
Select Free Tier.

-
Click Create Free Project.
The project details are displayed. These include the GraphQL API endpoint URL and Admin Secret, which are used for connecting applications.
-
Copy the endpoint URL and Admin Secret. You will need these to connect applications.
-
Note the Hasura Cloud IP. You will need to add this to your cluster IP allow list in YugabyteDB Managed.
Add the Hasura Cloud project to your Yugabyte cluster IP allow list
YugabyteDB Managed restricts access to clusters to IP addresses whitelisted in IP allow lists. To connect the Hasura project, you must add the project's IP address to the cluster IP allow list.
-
In YugabyteDB Managed, select your cluster, click Actions, and choose Edit IP Allow List.
-
Click Create New List and Add to Cluster.
-
Enter a name for the allow list (such as the name of your Hasura project) and the project IP address, and click Save.
Connect the cluster to your Hasura Cloud project
To connect your cluster:
-
In the Hasura Cloud Dashboard, click Launch Console.
This displays the Hasura Cloud Console for the project.
-
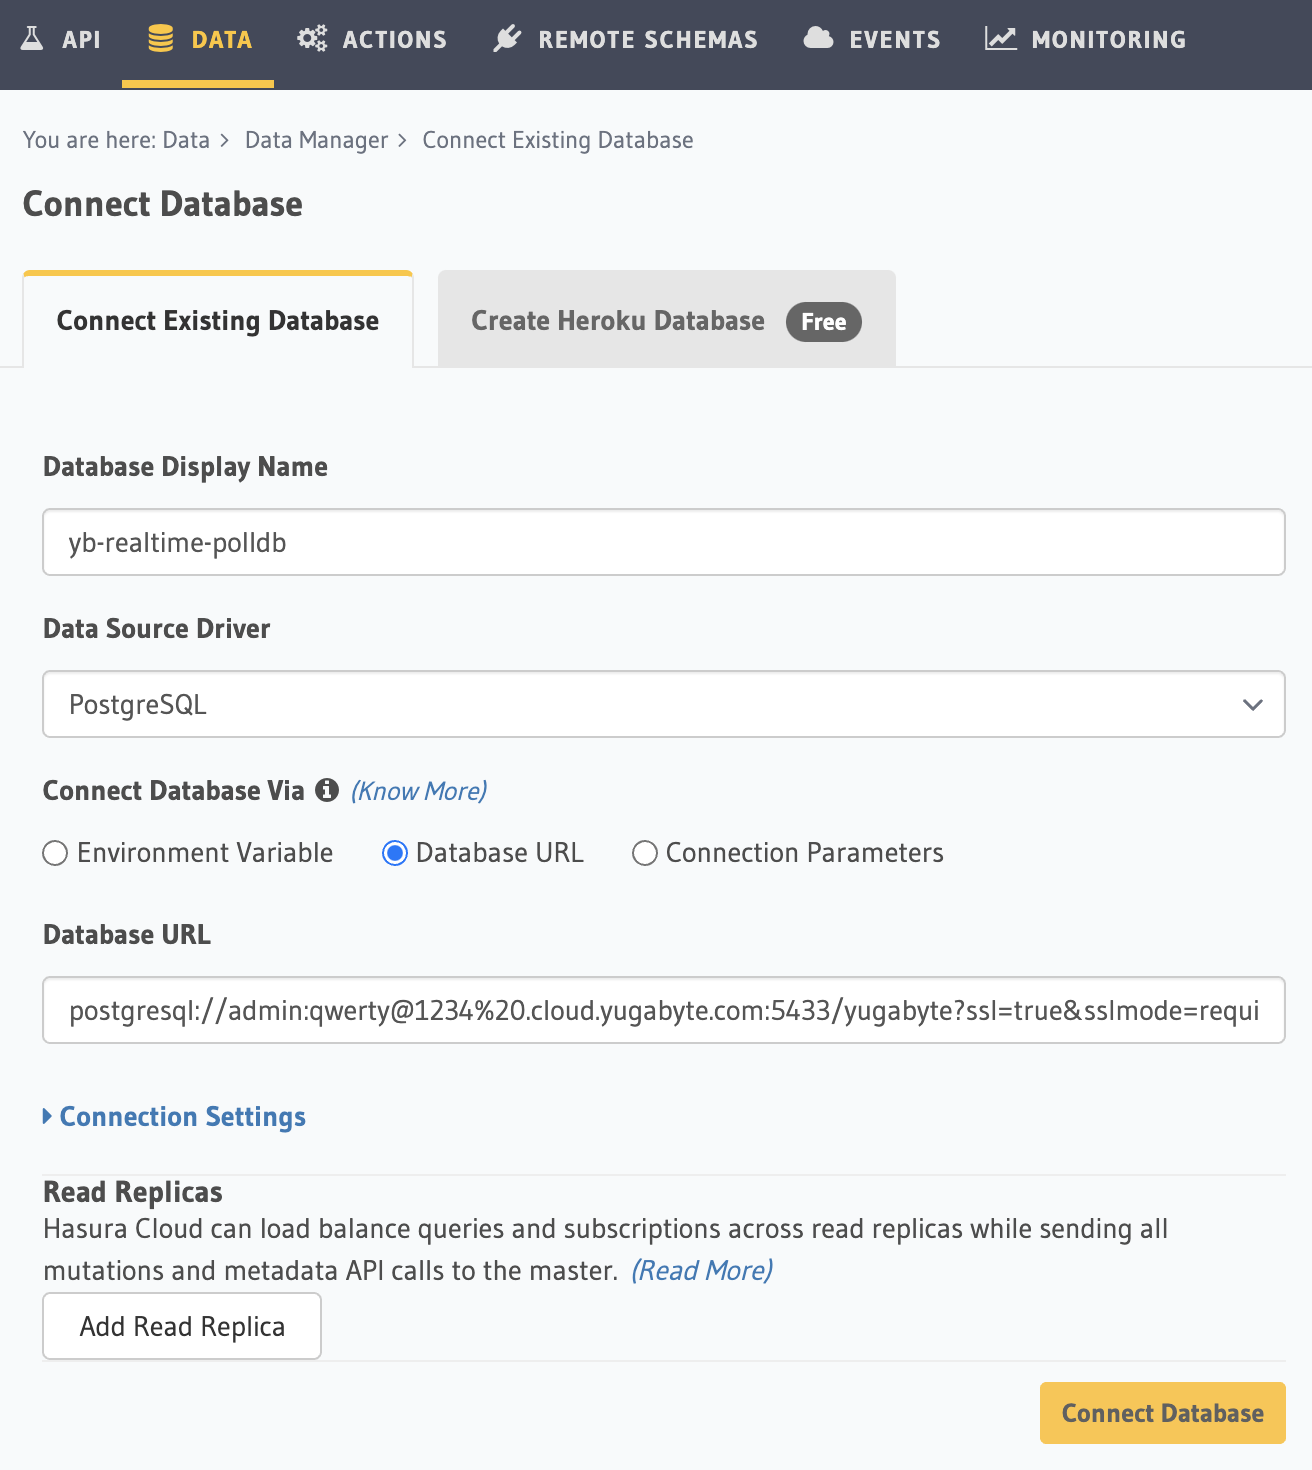
In the Hasura Cloud Console, click the Data tab.
-
Under Connect Existing Database, enter the following details:
- Database Display Name: enter a display name for your YugabyteDB Managed cluster
- Data Source Driver: PostgreSQL
- Connect Database Via: Database URL
-
Set the Database URL using your YSQL connection string. Be sure to encode any special characters in the string.
For example
postgresql://admin:qwerty@1234%20.cloud.yugabyte.com:5433/yugabyte?ssl=true&sslmode=require
-
Click Connect Database and wait for confirmation that the database has connected.
-
Click View Database.
The schema is empty, and your project is ready to be connected to an application.