Configure backup storage
Depending on your environment, you can save your YugabyteDB universe data to a variety of storage solutions.
Amazon S3
You can configure Amazon S3 as your backup target, as follows:
-
Navigate to Configs > Backup > Amazon S3.
-
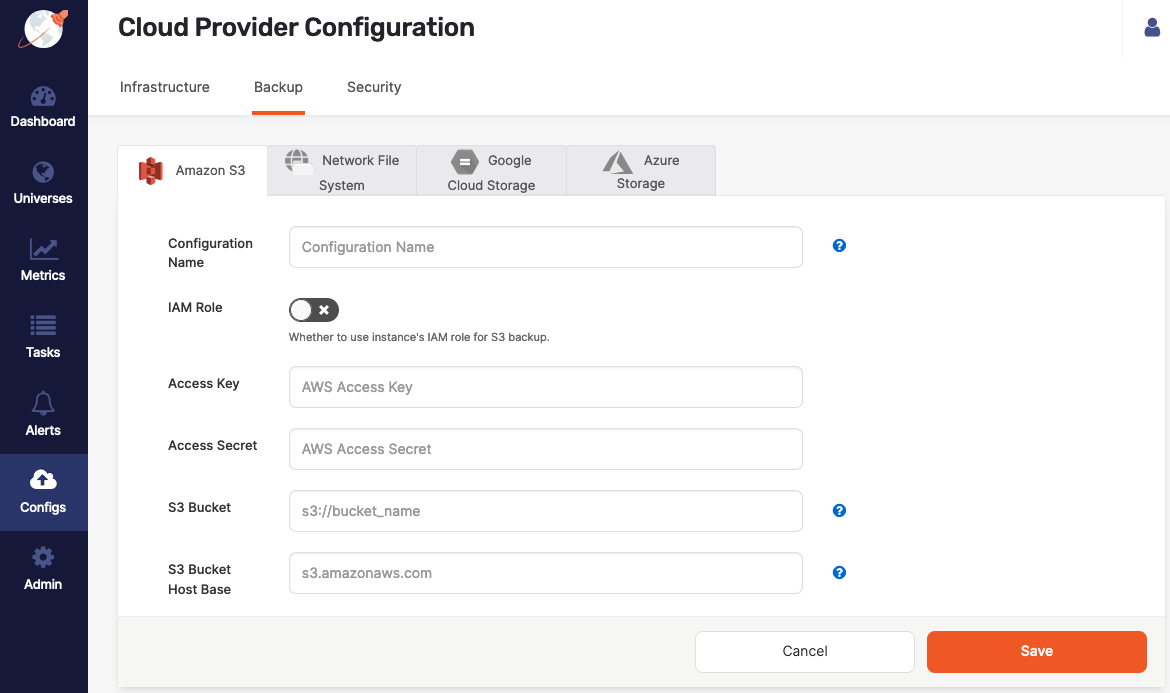
Click Create S3 Backup to access the configuration form shown in the following illustration:
-
Use the Configuration Name field to provide a meaningful name for your backup configuration.
-
Enable IAM Role to use the YugabyteDB Anywhere instance's Identity Access Management (IAM) role for the S3 backup. See Required S3 IAM permissions.
-
If IAM Role is disabled, enter values for the Access Key and Access Secret fields.
-
Enter values for the S3 Bucket and S3 Bucket Host Base fields.
For information on how to obtain AWS credentials, see Understanding and getting your AWS credentials.
-
Click Save.
You can configure access control for the S3 bucket as follows:
-
Provide the required access control list (ACL), and then define List, Write permissions to access Objects, as well as Read, Write permissions for the bucket, as shown in the following illustration:

-
Create Bucket policy to enable access to the objects stored in the bucket.
Required S3 IAM permissions
The following S3 IAM permissions are required:
"s3:DeleteObject",
"s3:PutObject",
"s3:GetObject",
"s3:ListBucket",
"s3:GetBucketLocation"
Network File System
You can configure Network File System (NFS) as your backup target, as follows:
-
Navigate to Configs > Backup > Network File System.
-
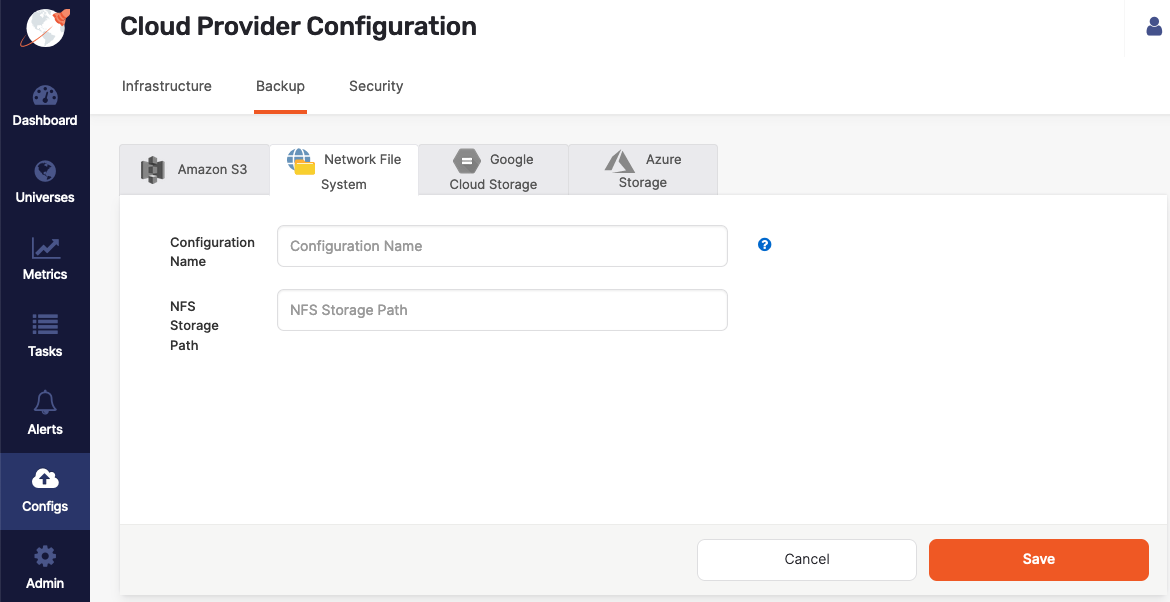
Click Create NFS Backup to access the configuration form shown in the following illustration:
-
Use the Configuration Name field to provide a meaningful name for your backup configuration.
-
Complete the NFS Storage Path field by entering
/backupor another directory that provides read, write, and access permissions to the SSH user of the YugabyteDB Anywhere instance. -
Click Save.
Google Cloud Storage
You can configure Google Cloud Storage (GCS) as your backup target, as follows:
-
Navigate to Configs > Backup > Google Cloud Storage.
-
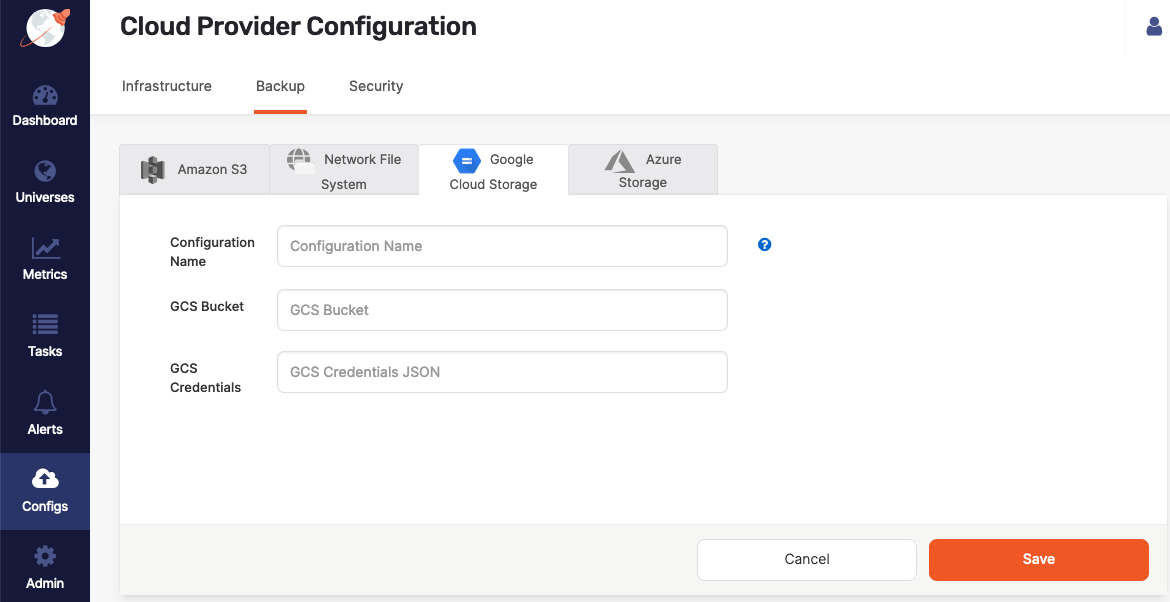
Click Create GCS Backup to access the configuration form shown in the following illustration:
-
Use the Configuration Name field to provide a meaningful name for your backup configuration.
-
Complete the GCS Bucket and GCS Credentials fields.
For information on how to obtain GCS credentials, see Cloud Storage authentication.
-
Click Save.
You can configure access control for the GCS bucket as follows:
- Provide the required access control list (ACL) and set it as either uniform or fine-grained (for object-level access).
- Add permissions, such as roles and members.
Azure Storage
You can configure Azure as your backup target, as follows:
-
Create a storage account in Azure, as follows:
-
Navigate to Portal > Storage Account and click Add (+).
-
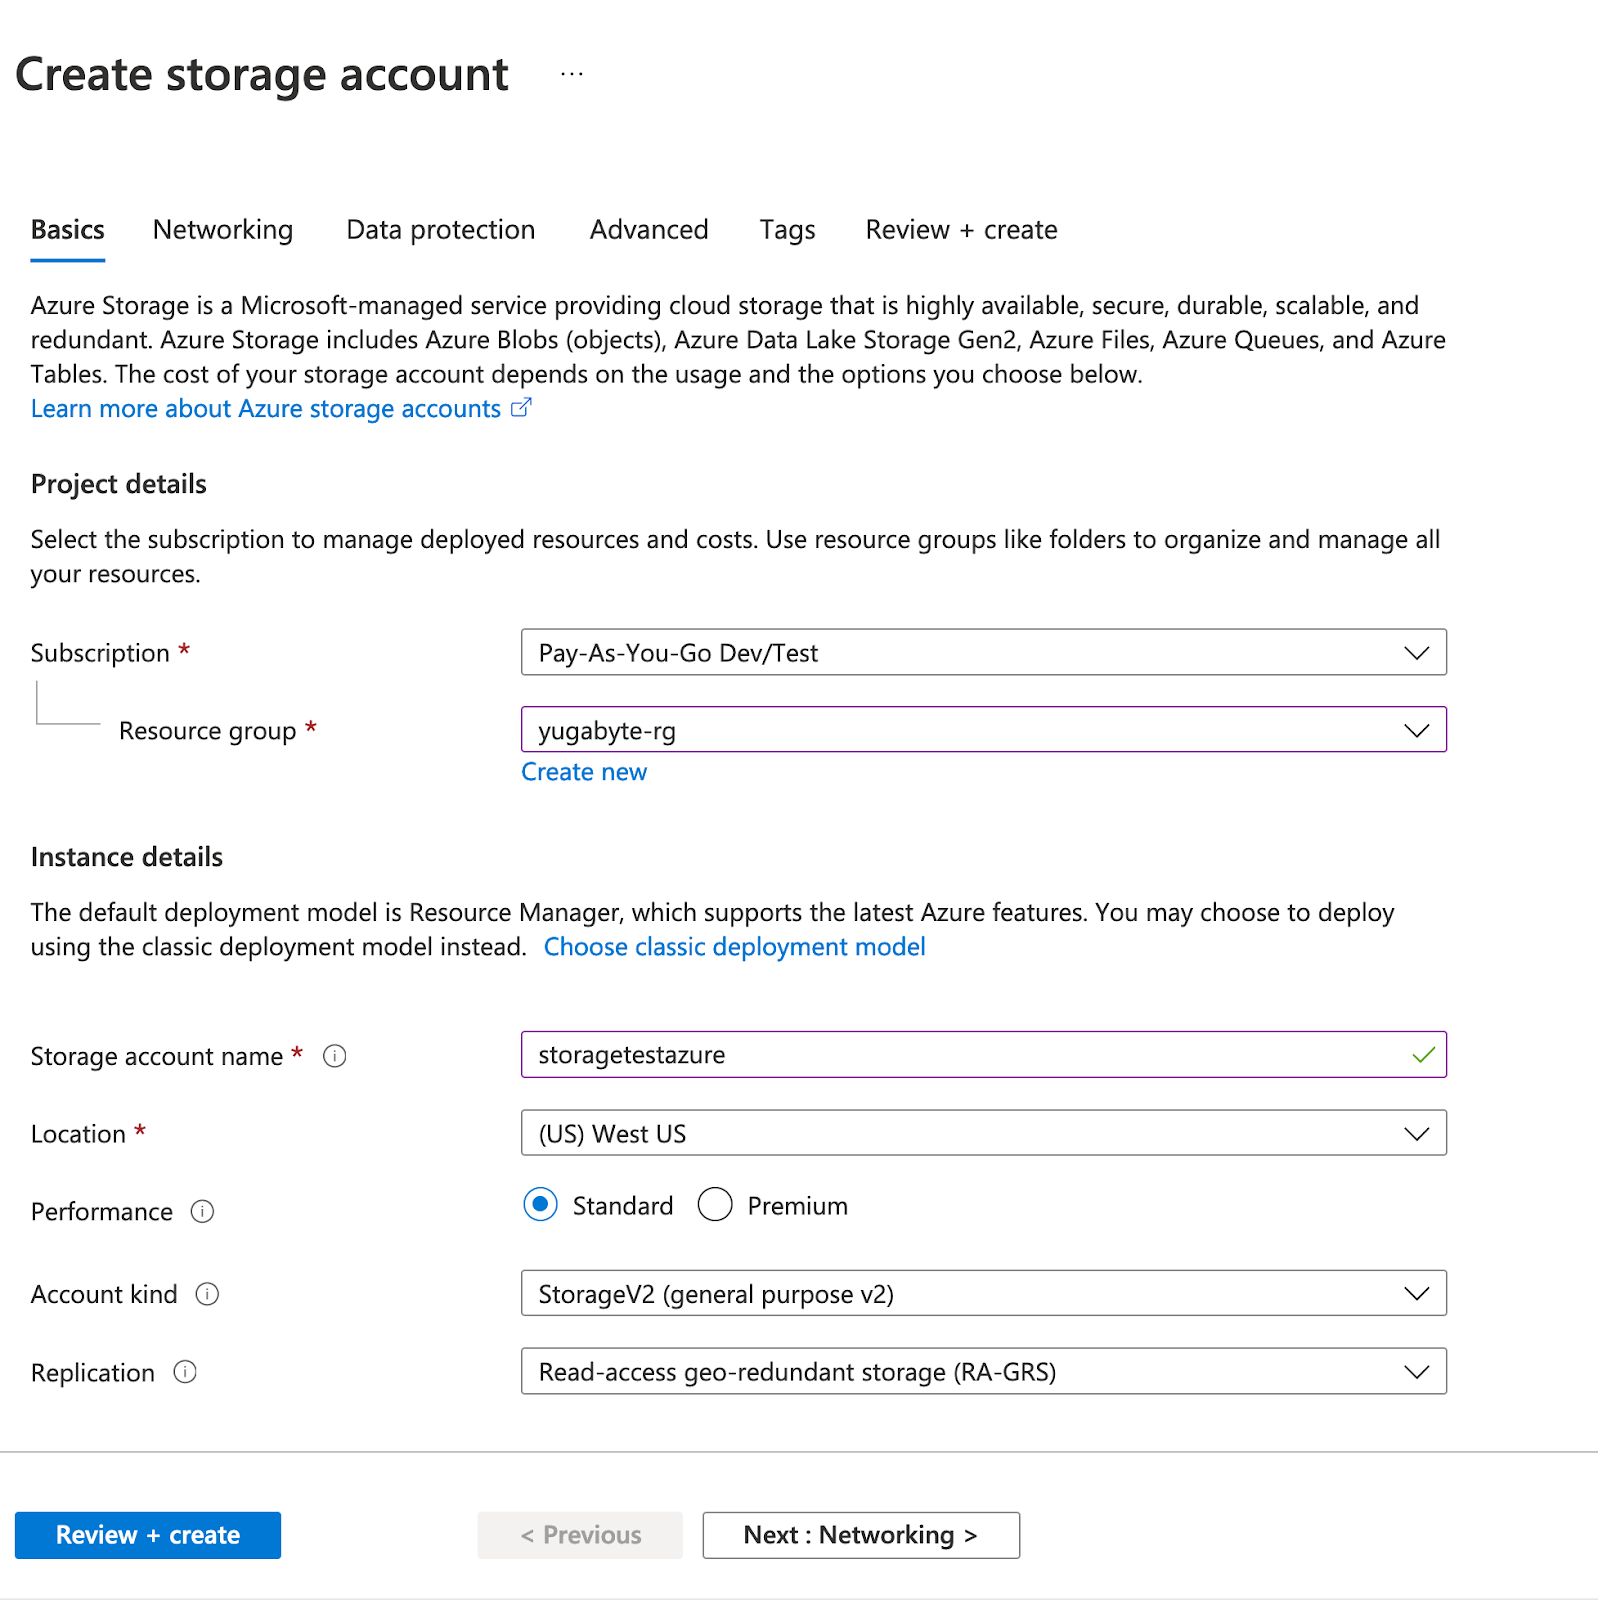
Complete the mandatory fields, such as Resource group, Storage account name, and Location, as per the following illustration:
-
-
Create a blob container, as follows:
-
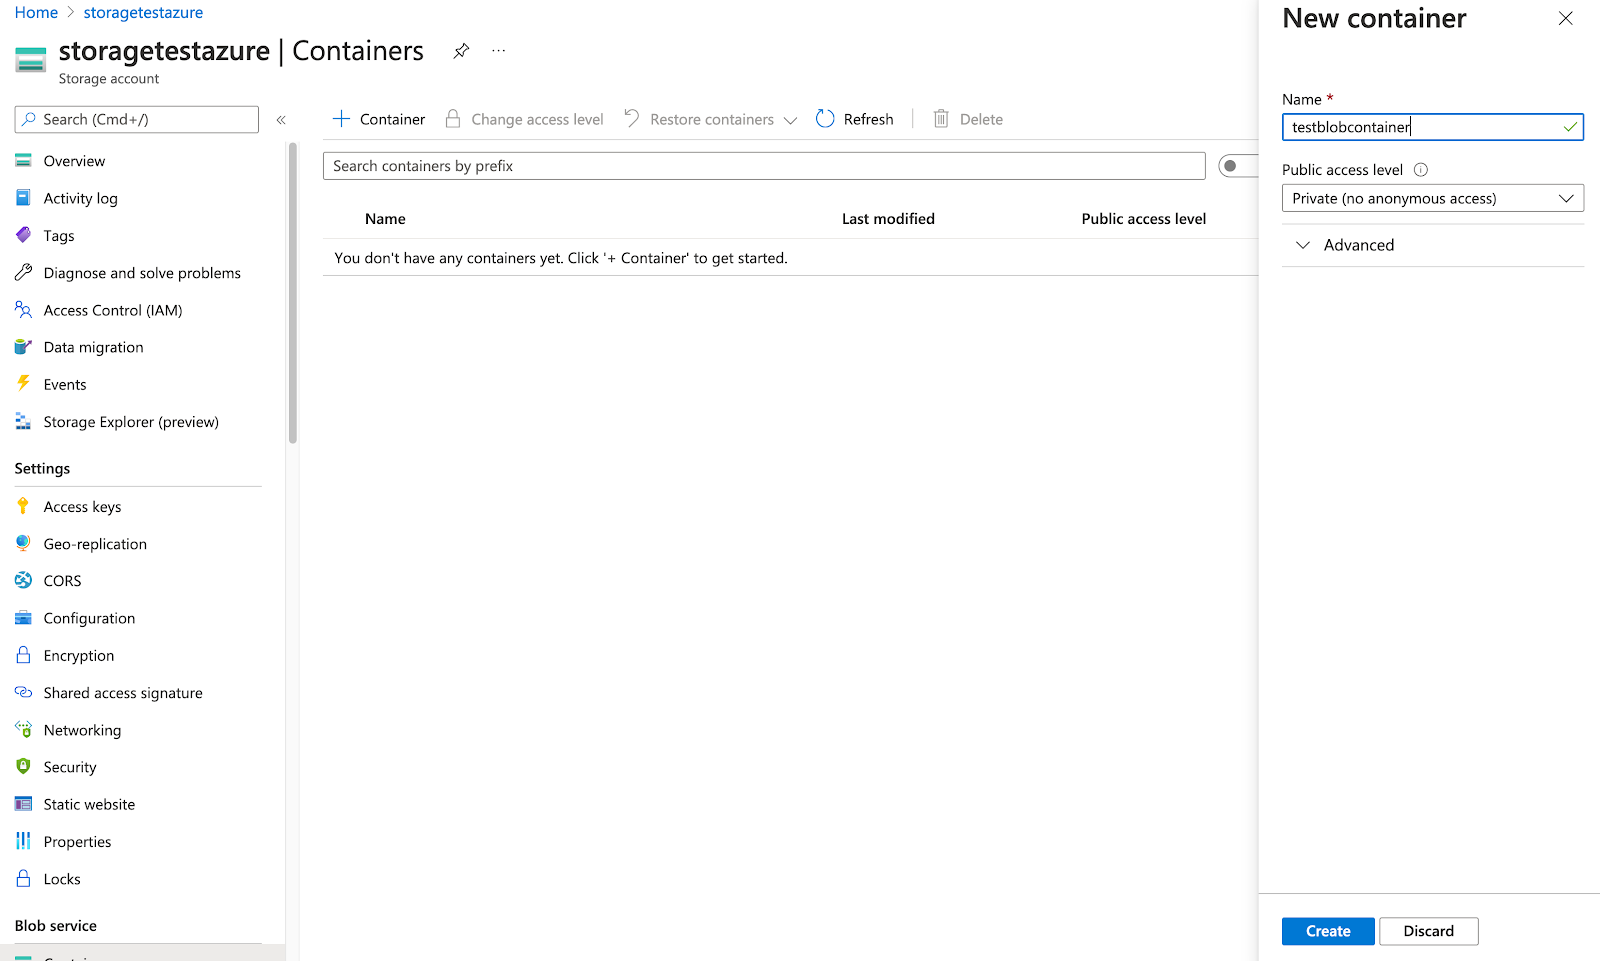
Open the storage account (for example, storagetestazure, as shown in the following illustration).
-
Navigate to Blob service > Containers > + Container and then click Create.
-
-
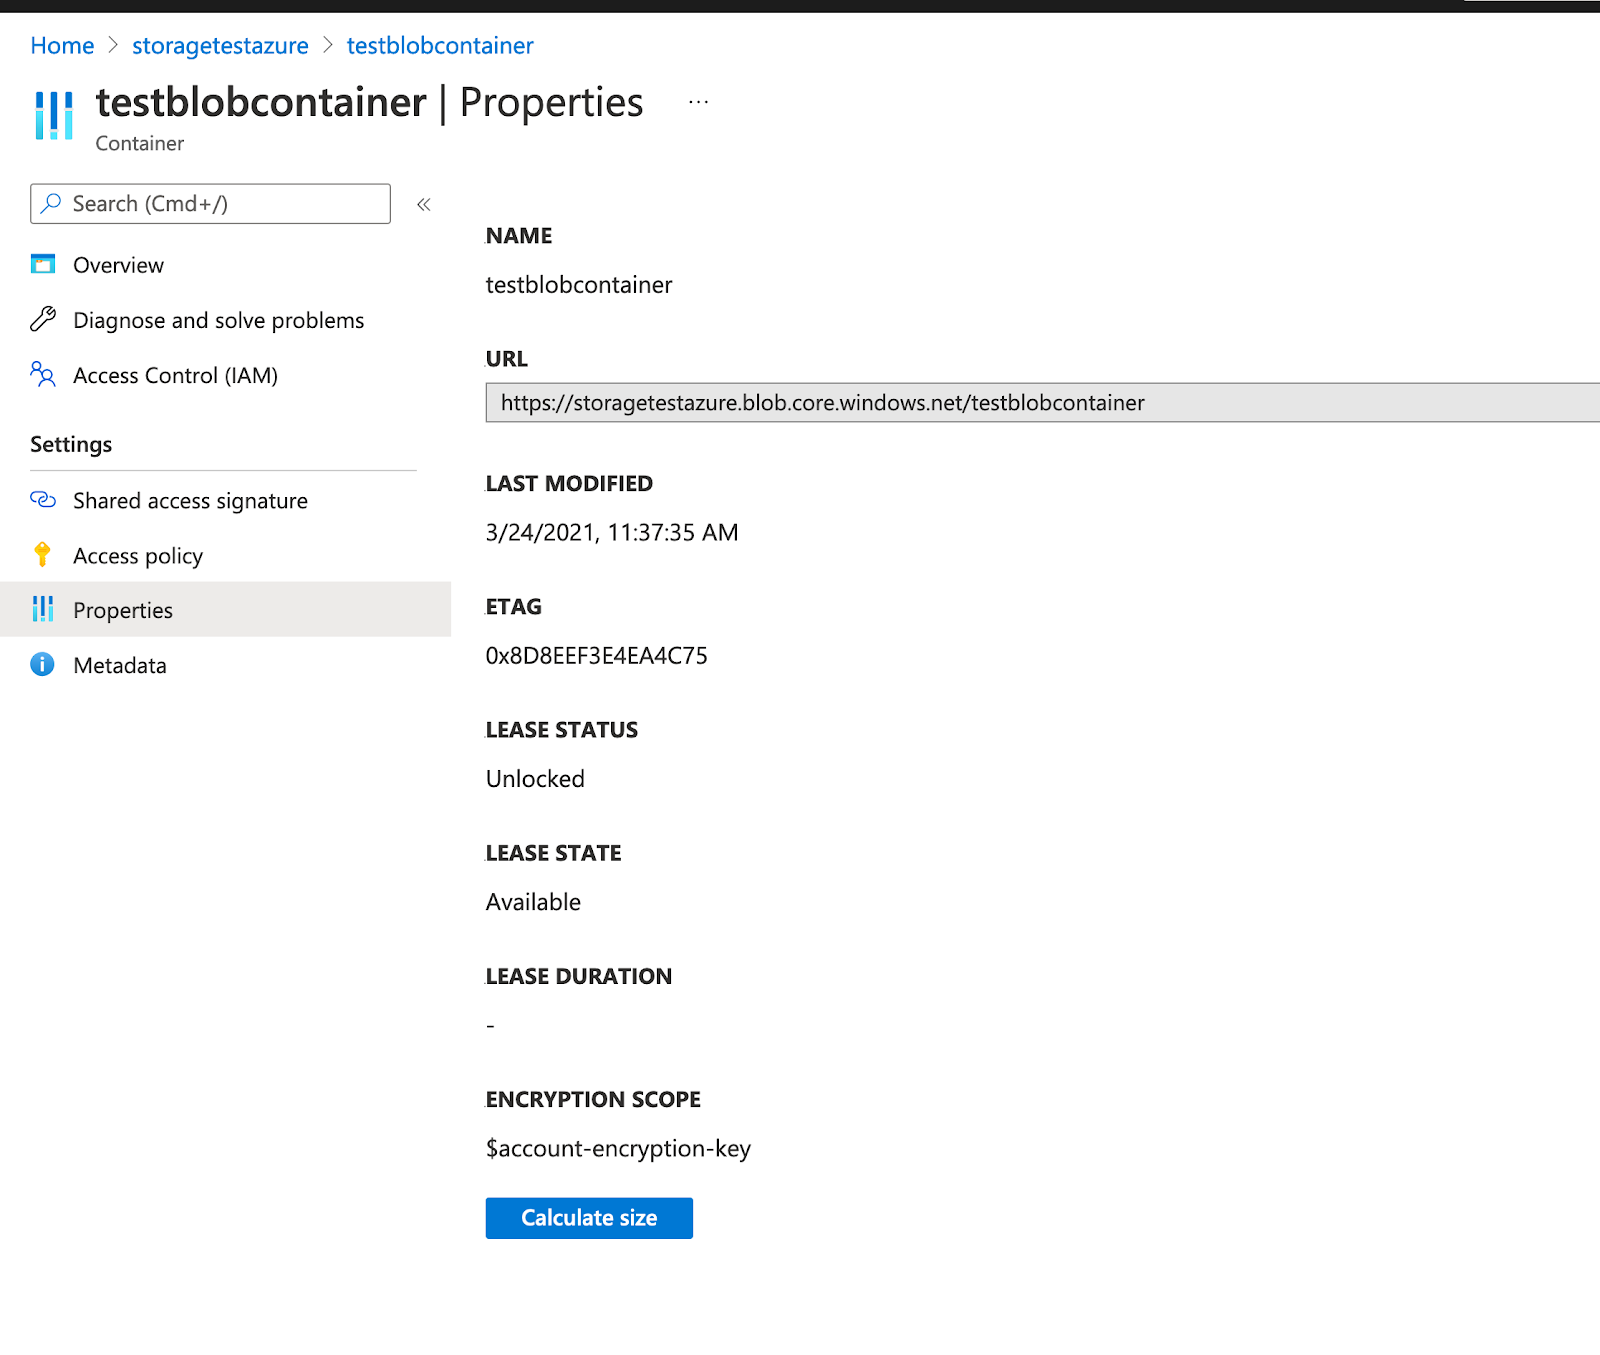
Obtain the container URL by navigating to Container > Properties, as shown in the following illustration:
-
Generate an SAS Token, as follows:
-
Navigate to Storage account > Shared access signature, as shown in the following illustration.
-
Under Allowed resource types, select Container and Object.
-
Click Generate SAS and connection string and copy the SAS token. Note that the token should start with
?sv=.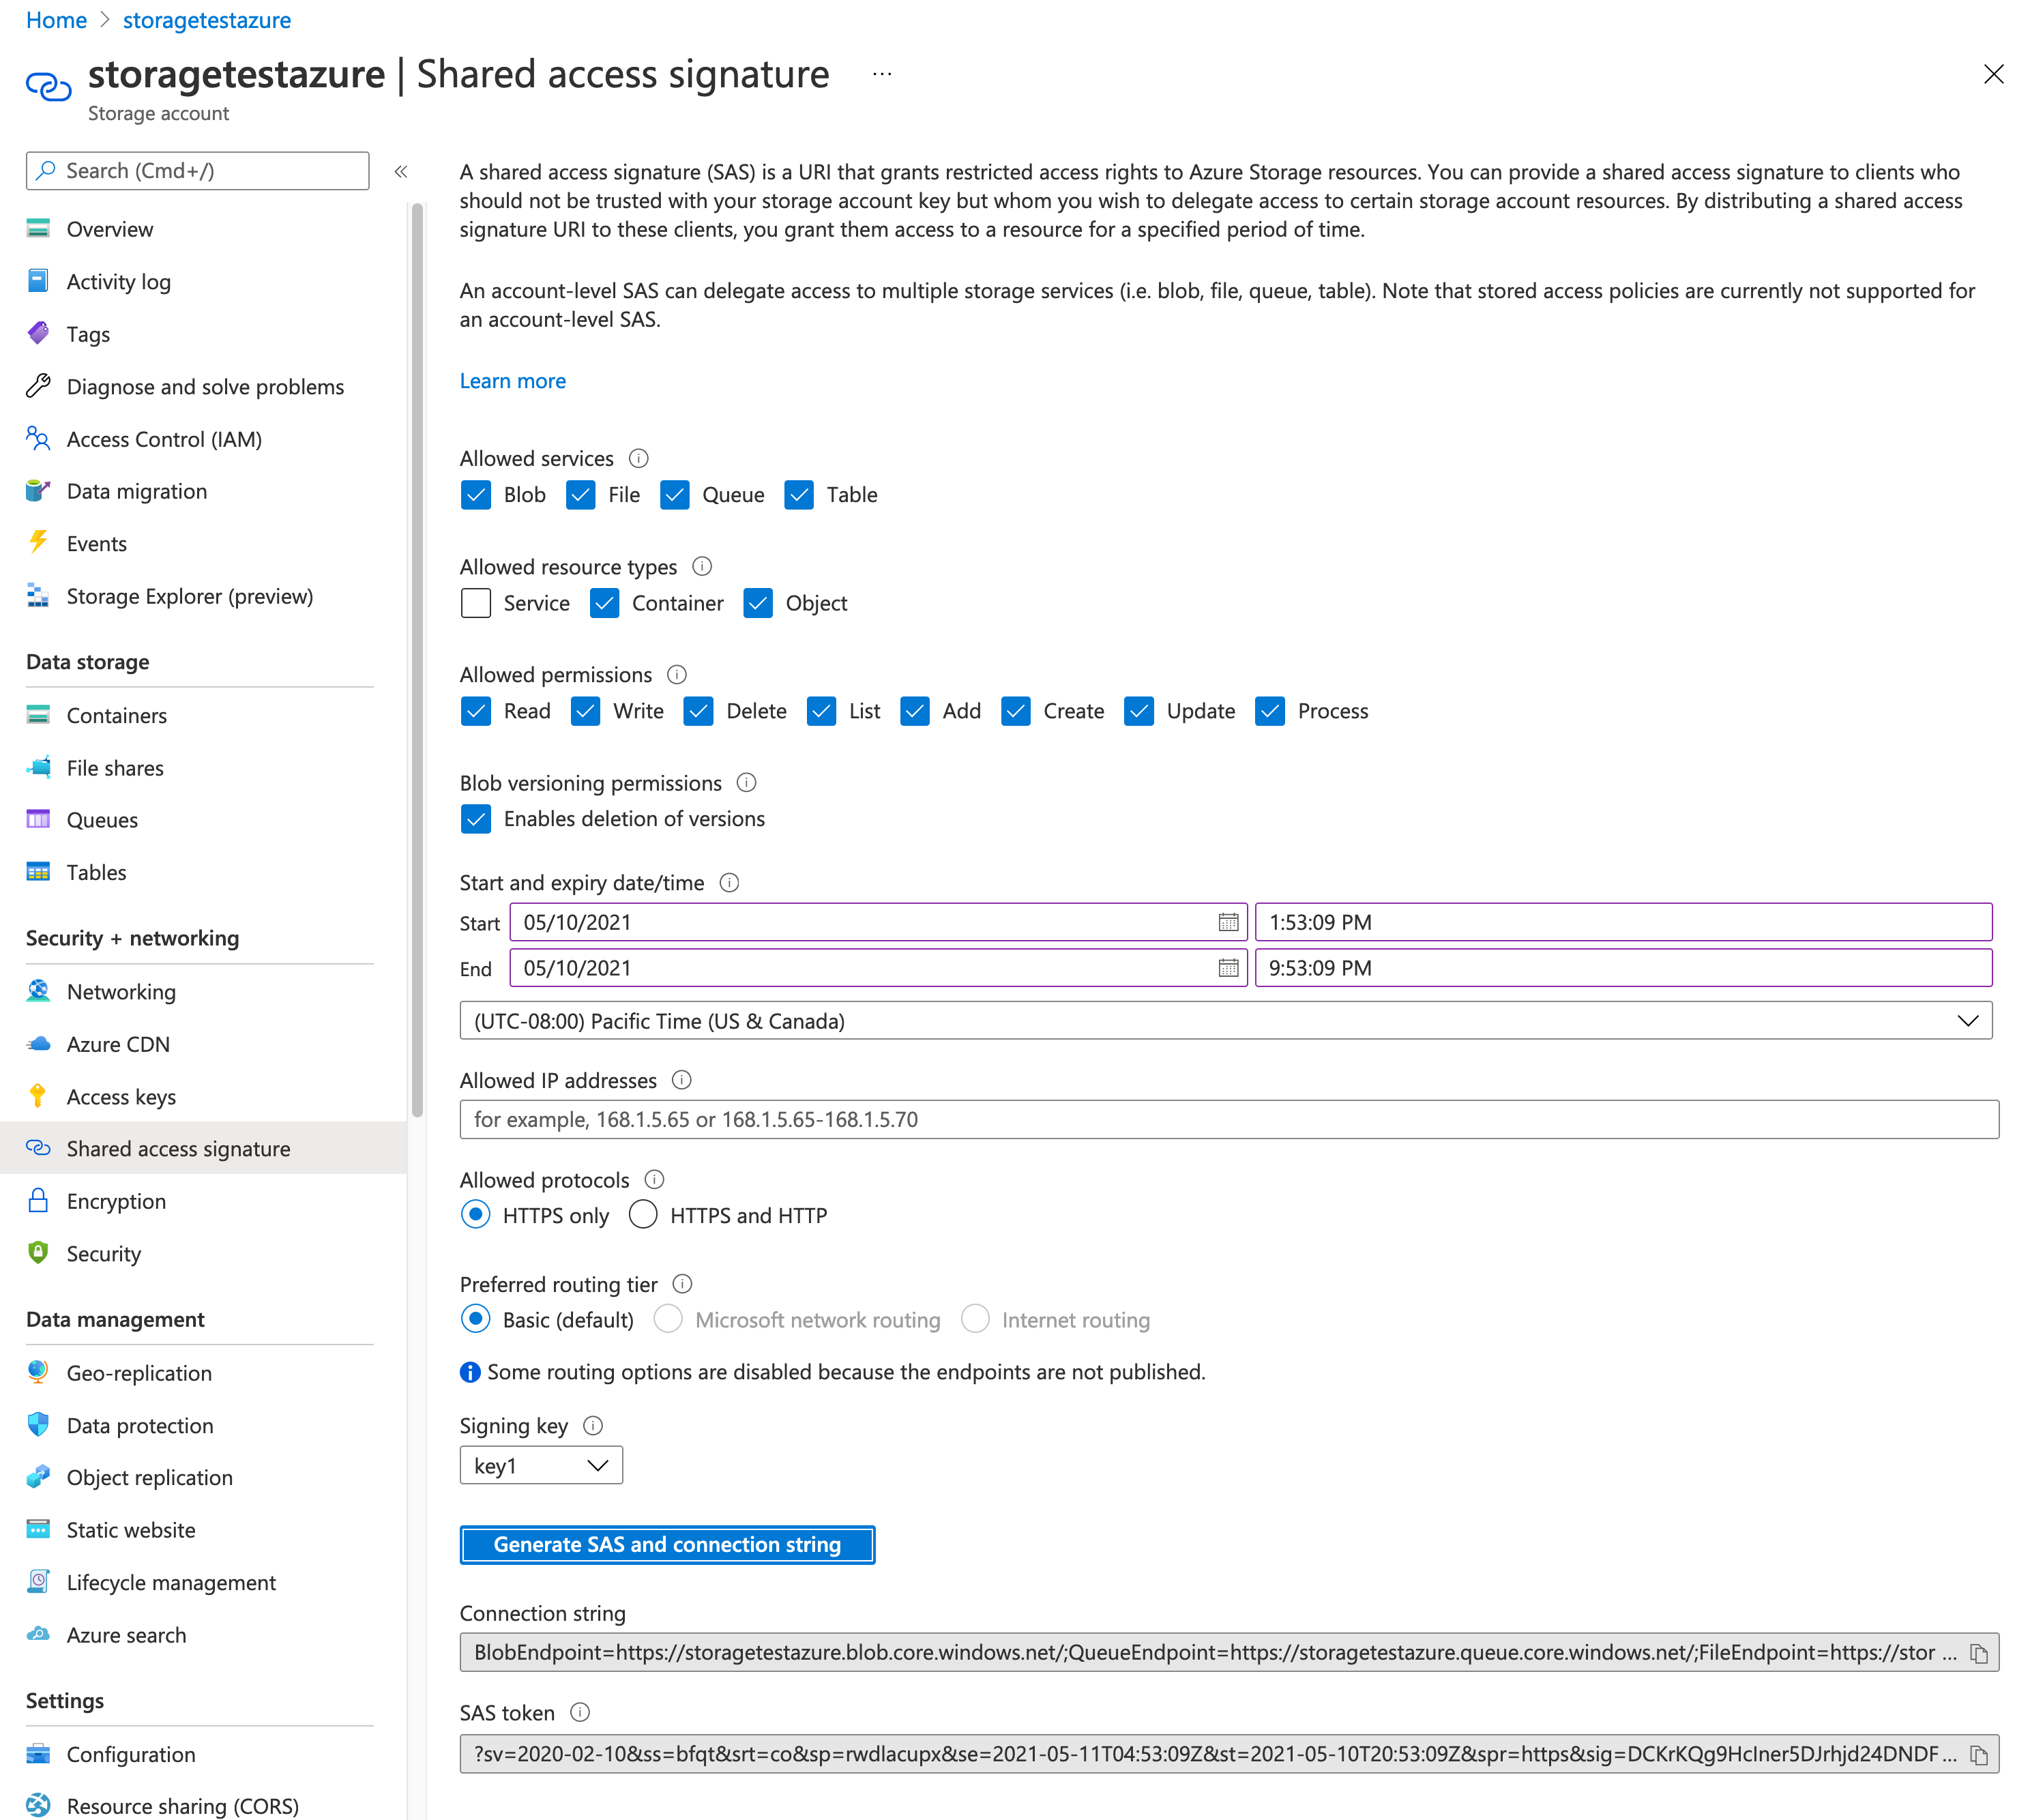
-
-
On your YugabyteDB Anywhere instance, provide the container URL and SAS token for creating a backup, as follows:
-
Navigate to Configs > Backup > Azure Storage.
-
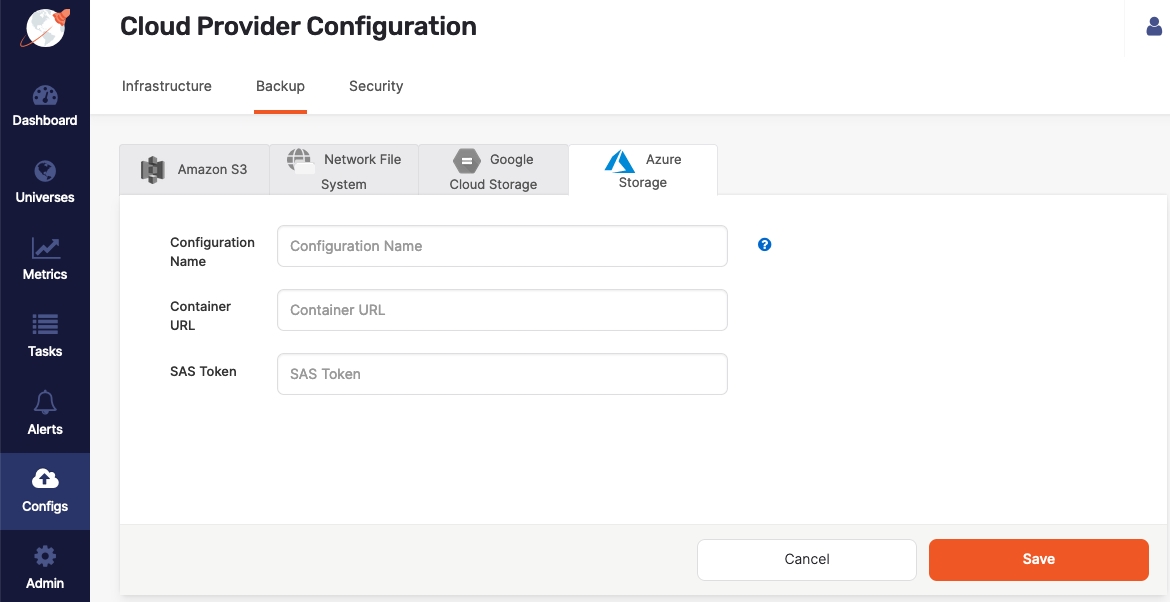
Click Create AZ Backup to access the configuration form shown in the following illustration:
-
Use the Configuration Name field to provide a meaningful name for your backup configuration.
-
Enter values for the Container URL and SAS Token fields, and then click Save.
-