Restore universe YCQL data
Basic restore procedure
You can restore YugabyteDB universe YCQL data from a backup as follows:
-
Open your universe and select Backups.
-
If you want to restore a backup from a specific keyspace, click on the backup and use its Backup Details page to perform the restore procedure.
-
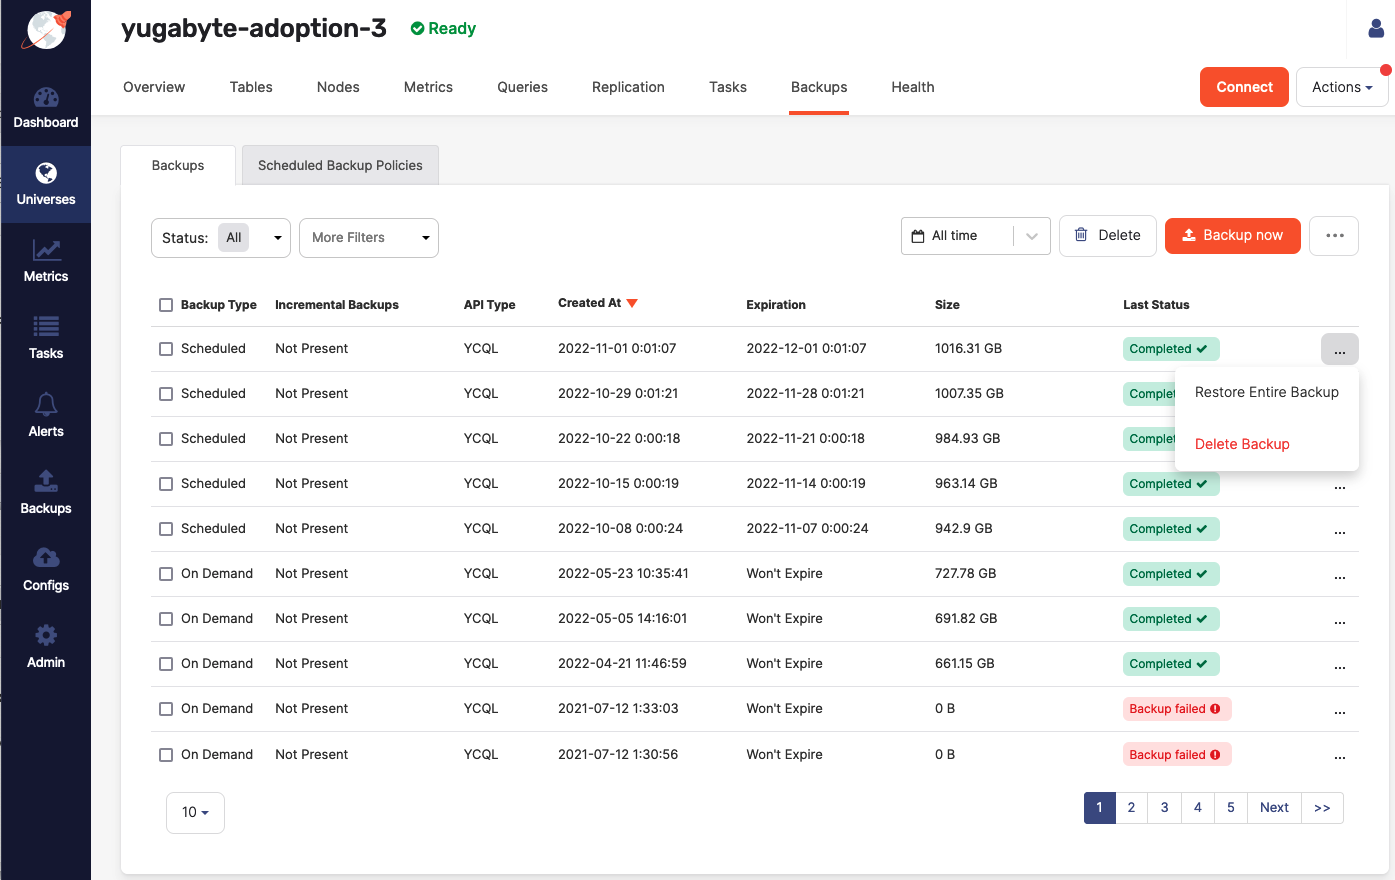
If you want to restore a full backup, use the Backups page to select the backup and click its ... > Restore Entire Backup, as per the following illustration:
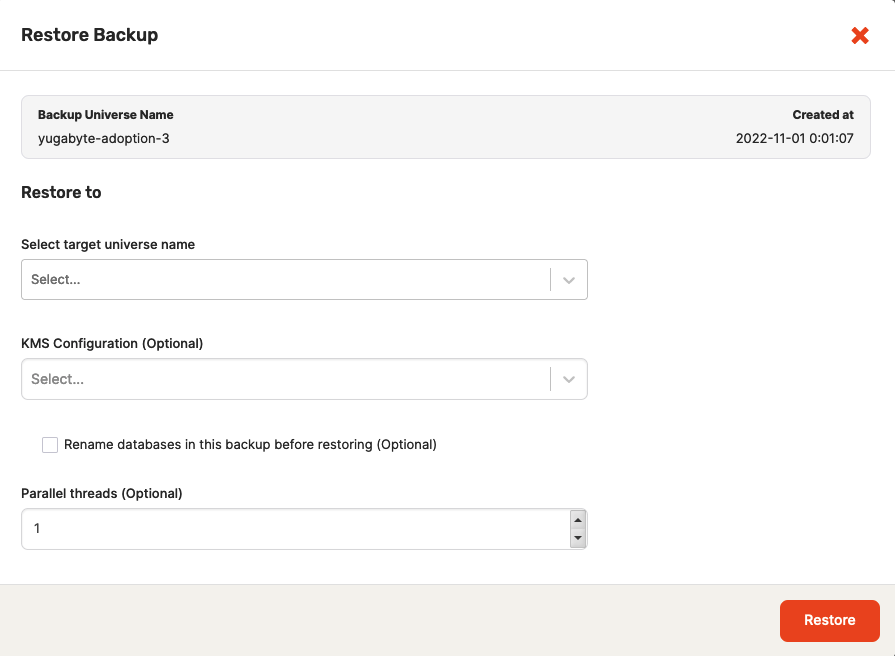
Complete the fields of the Restore Backup dialog shown in the following illustration:
-
Select the name of the universe to which you want to restore the backup.
-
Optionally and depending on your cloud provider, if you are restoring data from a universe that has, or previously had, encryption at rest enabled, then you must select the KMS configuration to use so that the master keys referenced in the metadata file can be retrieved. If the universe was previously encrypted at rest, but is not currently, then the retrieved keys assure that any existing files can be decrypted. The retrieved keys are used to build and augment the universe key registry on the restored universe with the required master keys. The universe data files are restored normally afterwards.
-
Optionally, specify the number of parallel threads that are allowed to run. This can be any number between
1and100. -
Select Rename databases in this backup before restoring and then click Next: Rename Database/Keyspaces.
-
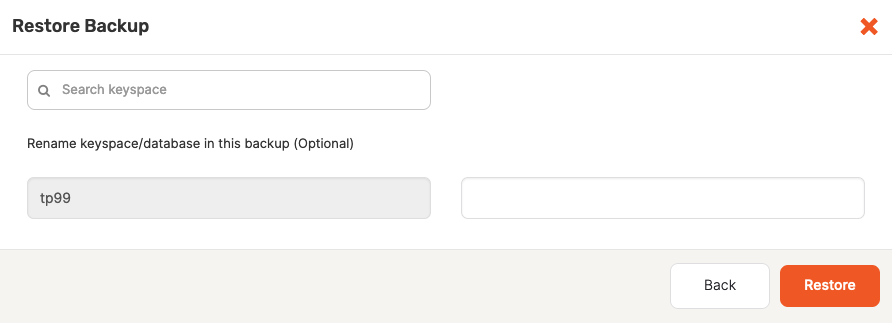
Specify the new name for a keyspace or database in the backup and click Restore, as per the following illustration:
The restore begins immediately. When finished, a completed Restore Backup task appears under Tasks > Task History.
-
-
If your backup includes incremental backups, you can either restore the complete backup, as per step 3, or restore a part of an incremental backup chain by selecting an increment from the list in the Backup Details view and clicking its Restore to this point.
During the restore, only successful complete and incremental backups are used, whereas failed backups are discarded.
-
To confirm that the restore succeeded, select the Tables tab to compare the original table with the table to which you restored.
Advanced restore procedure
In addition to the basic restore, an advanced option is available if you have more than one YugabyteDB Anywhere installation and want to restore a database or keyspace from a different YugabyteDB Anywhere installation to the current universe.
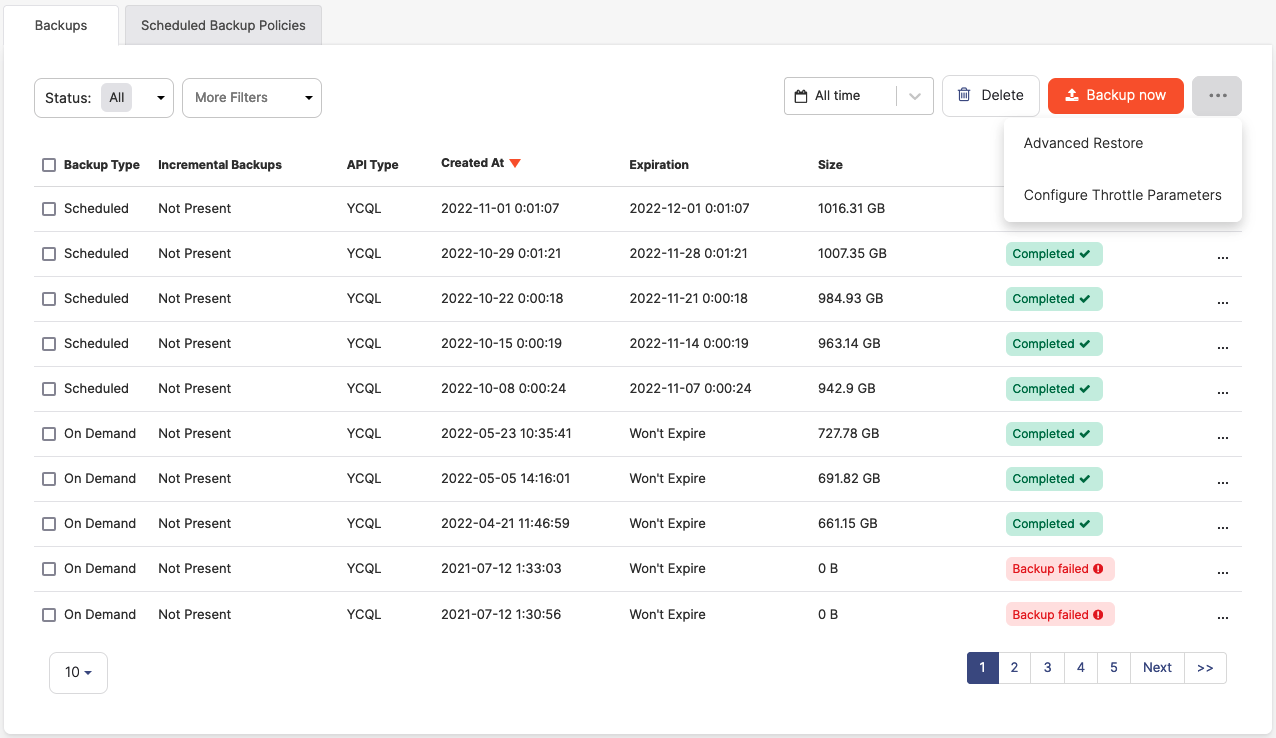
To perform this type of restore, click ... > Advanced Restore, as per the following illustration:
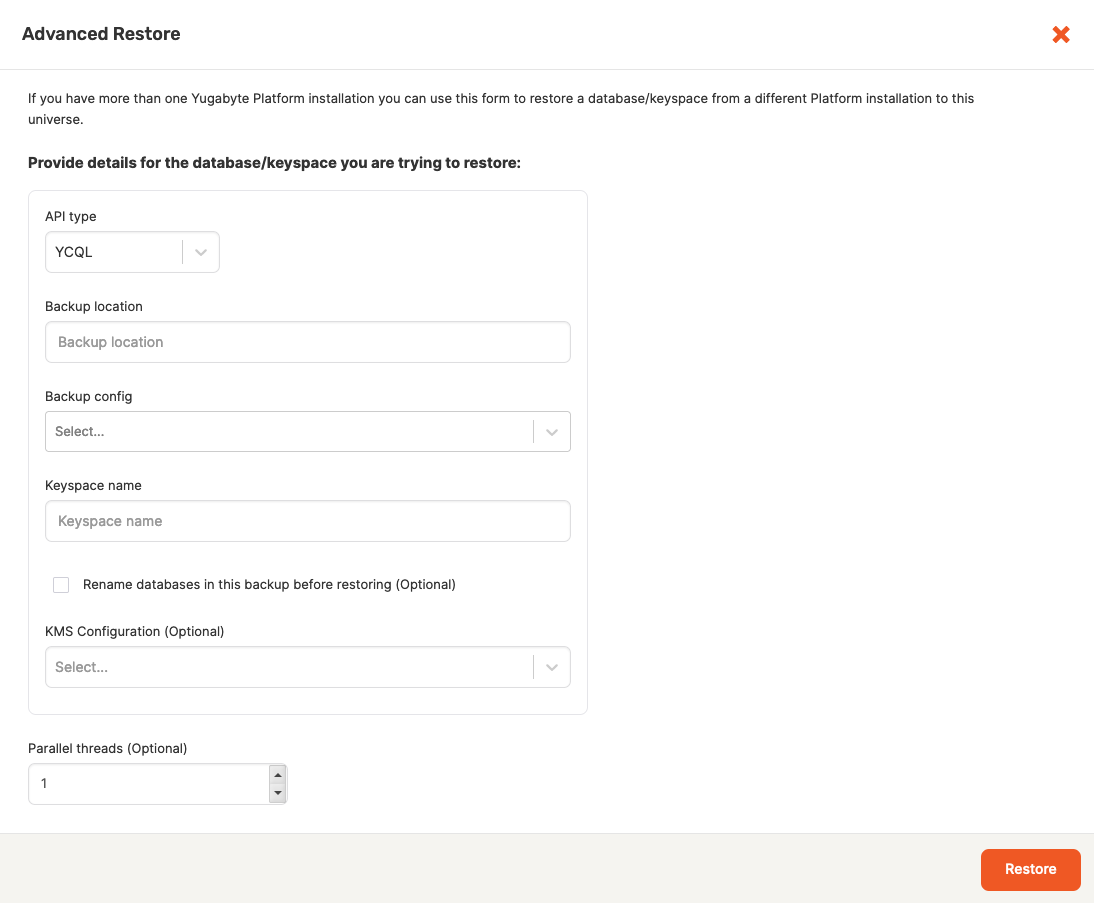
To proceed, complete the fields of the Advanced Restore dialog shown in the following illustration:
-
Select YCQL as the type of API.
-
Specify the location of the backup you want to restore.
-
Select the cloud provider-specific configuration of the backup storage. The storage could be on Google Cloud, Amazon S3, Azure, or Network File System.
-
Specify the name of the database from which you are performing a restore.
-
Optionally, specify the number of parallel threads that are allowed to run. This can be any number between 1 and 100.
-
Optionally, if the backup involved universes that had encryption at rest enabled, then select the KMS configuration to use.
-
If you do not select Rename databases in this backup before restoring, then click Restore to start the restore process immediately.
If you select Rename databases in this backup before restoring, then click Next: Rename Database/Keyspaces, specify the new name for a keyspace or database in the backup and click Restore.
You can access a list of all backups from all universes by navigating to Backups on the YugabyteDB Anywhere left-side menu, as per the following illustration:
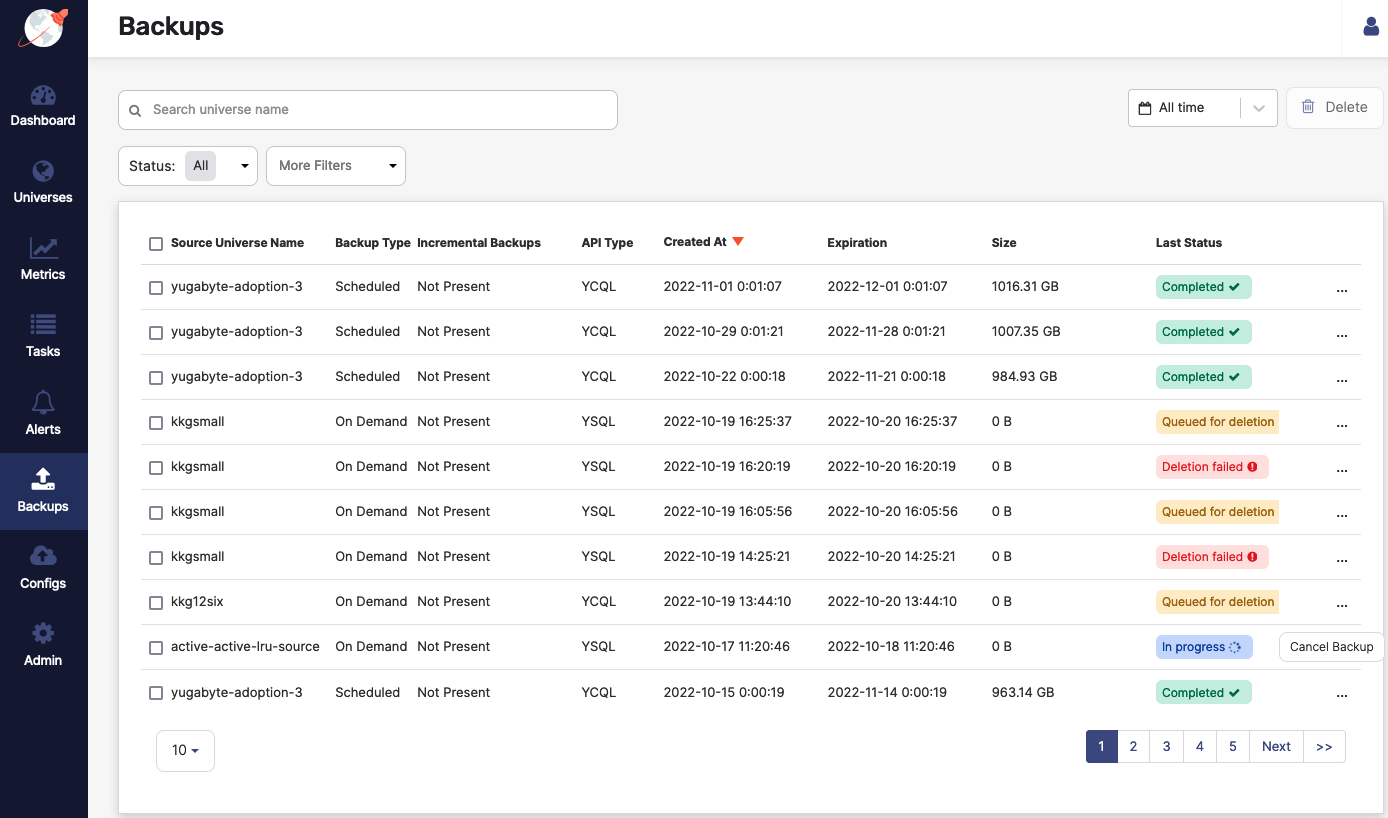
By clicking on a specific universe included in the list, you can access the backup details and trigger a restore.