xCluster replication
YugabyteDB Anywhere allows you to use its UI or API to manage asynchronous replication between independent YugabyteDB clusters. You can perform deployment via unidirectional (master-follower) or bidirectional (multi-master) xCluster replication between two data centers.
Within the concept of replication, universes are divided into the following categories:
-
A source universe contains the original data that is subject to replication.
-
A target universe is the recipient of the replicated data. One source universe can replicate to one or more target universes.
For additional information on xCluster replication in YugabyteDB, see the following:
- xCluster replication: overview and architecture
- xCluster replication between universes in YugabyteDB
You can use the YugabyteDB Anywhere UI to set up and configure xCluster replication for universes. In addition, you can perform monitoring by accessing the information about the replication lag and enabling alerts on excessive lag.
Set up replication
You can set up xCluster replication as follows:
-
Open the YugabyteDB Anywhere UI and navigate to Universes.
-
Select the universe you want to replicate and navigate to Replication.
-
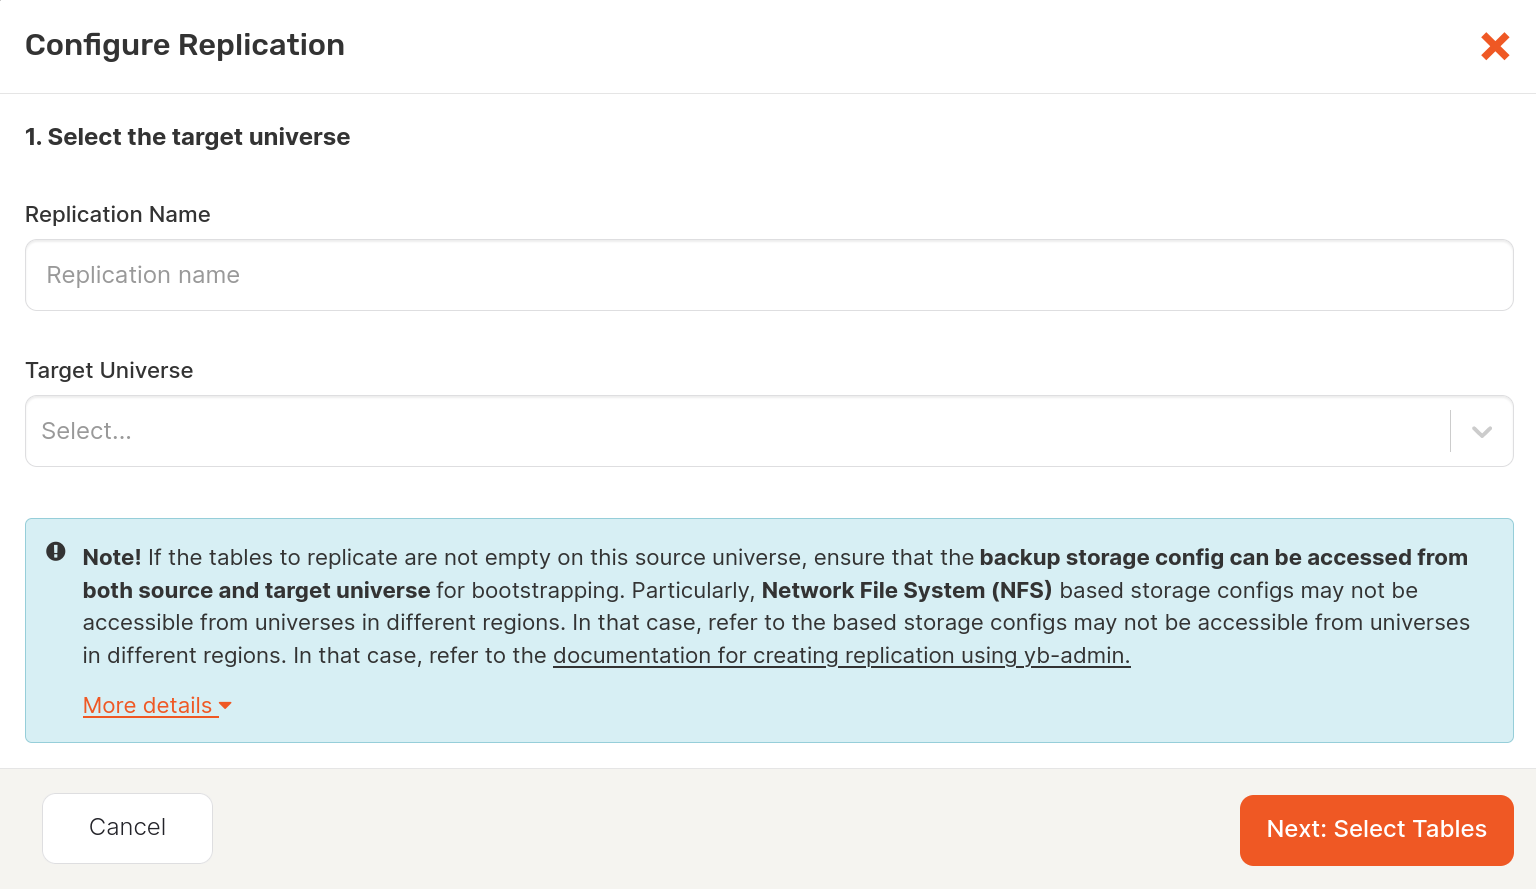
Click Configure Replication to open the dialog shown in the following illustration:
-
Provide a name for your replication. This name cannot contain [SPACE '_' '*' '<' '>' '?' '|' '"' NULL].
-
Select the target universe.
Note that paused universes are not included in the selection list.
-
Click Next: Select Tables.
-
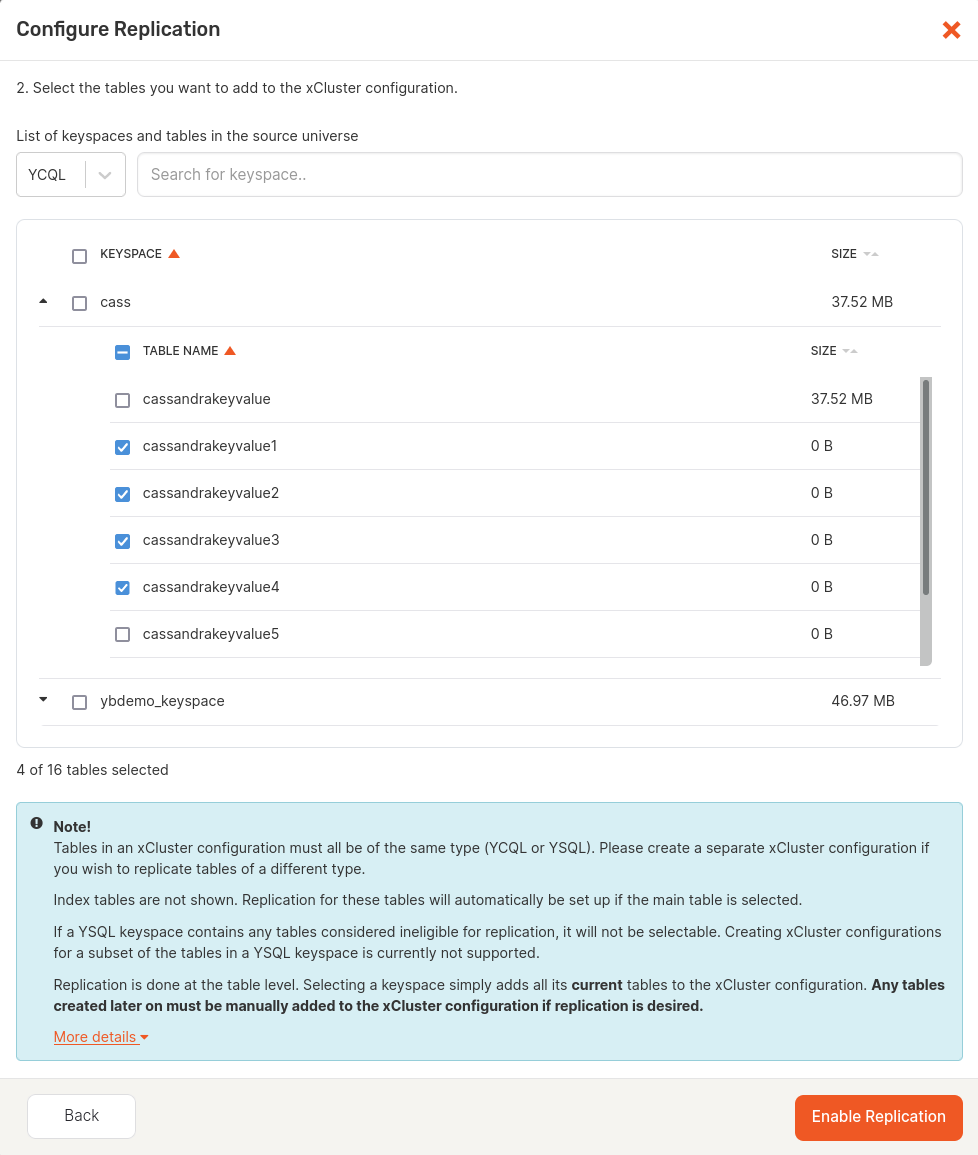
From a list of common tables between source and target universes, select the tables you want to include in the replication, as per the following illustration:
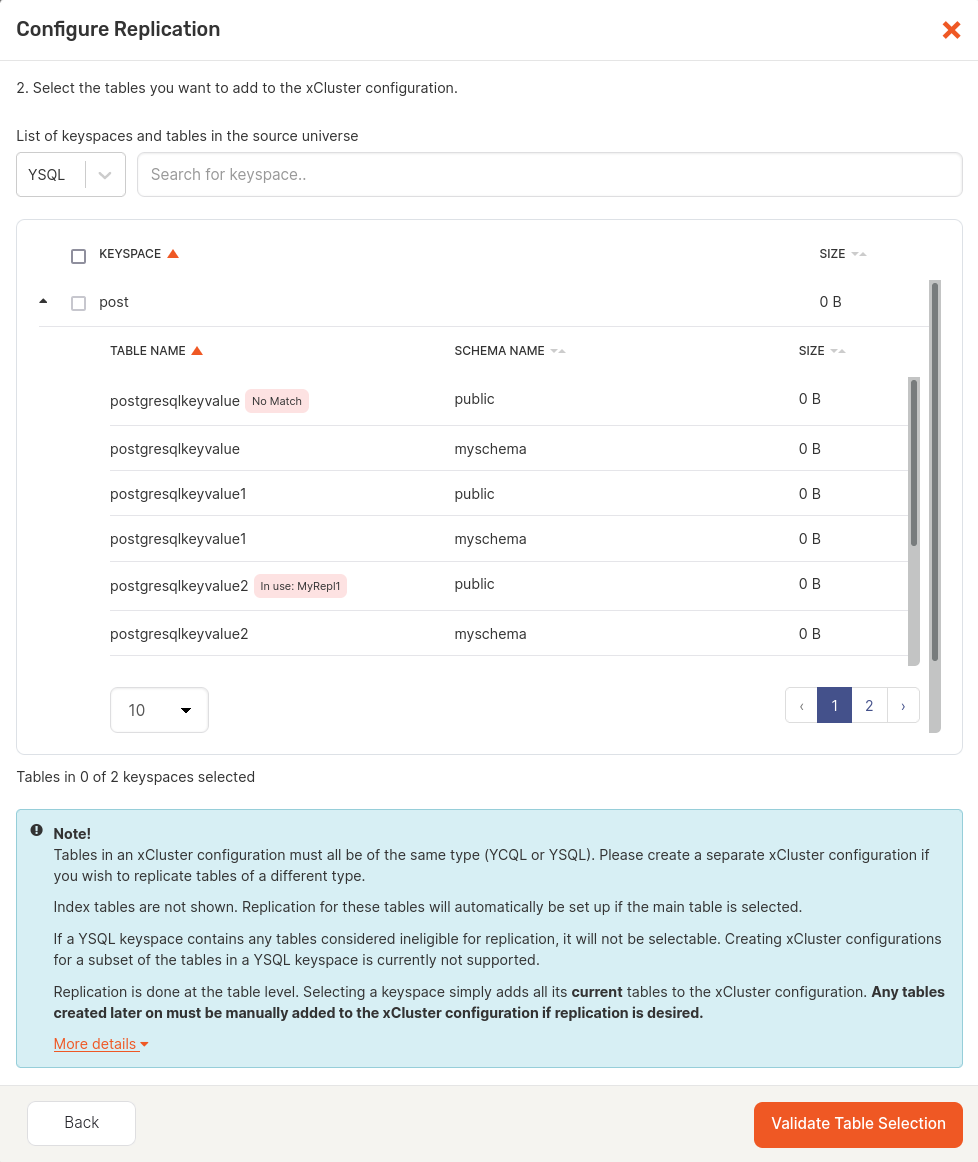
Note that even though index tables are not displayed in the YugabyteDB Anywhere UI, the replication is automatically set up for them if it is set up for their main table. If a new index table is created after the replication has been set up, it is not added to the replication configuration automatically. To add the new index table to the replication configuration, you need to restart the replication for the main table.
See About the table selection for additional information.
-
Click Validate Table Selection.
This triggers YugabyteDB Anywhere to check whether or not bootstrapping is required for the selected database and its tables:
-
If bootstrapping is not required, Validate Table Selection changes to Enable Replication which you need to click in order to set up replication:
-
If bootstrapping is required, Validate Table Selection changes to Next: Configure Bootstrap which you need to click in order to access the bootstrapping settings, and then proceed by completing the fields of the dialog shown in the following illustration:
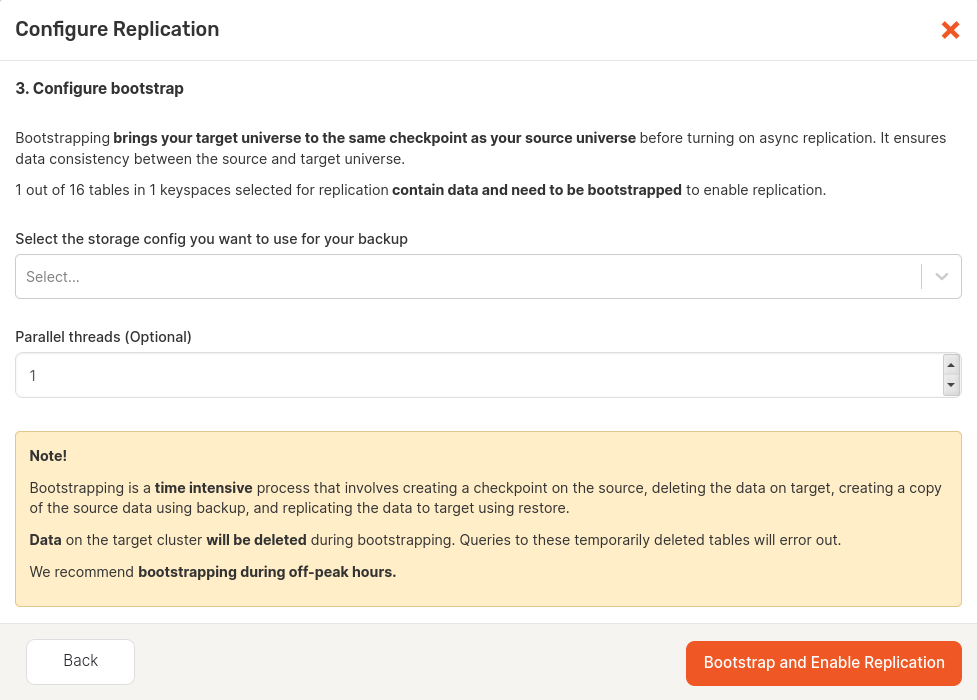
Select the storage configuration to be used during backup and restore part of bootstrapping. For information on how to configure storage, see Configure backup storage.
Optionally, specify the number of parallel threads that can run during bootstrapping. The greater number would result in a more significant decrease of the backup and restore time, but put more pressure on the universes.
Clicking Bootstrap and Enable Replication starts the process of setting up replication. Tables that do not require bootstrapping are set up for replication first, followed by tables that need bootstrapping, database per database.
You can view the progress on xCluster tasks by navigating to Universes, selecting the source universe, and then selecting Tasks.
-
-
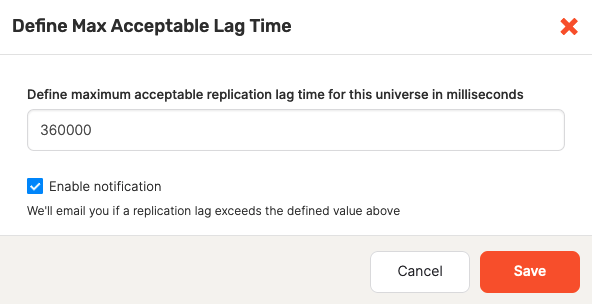
Optionally, configure alerts on lag, as follows:
- Click Max acceptable lag time.
- Use the Define Max Acceptable Lag Time dialog to enable or disable alert issued when the replication lag exceeds the specified threshold, as per the following illustration:
About the table selection
Tables in an xCluster configuration must be of the same type: either YCQL or YSQL. If you are planning to replicate tables of different types, you need to create separate xCluster configurations.
To be considered eligible for xCluster replication, tables must meet the following criteria:
- The table is not already in use. That is, the table is not involved in another xCluster configuration between the same two universes in the same direction.
- A matching table exists on the target universe. That is, a table with the same name in the same keyspace and with the same schema exists on the target universe.
If a YSQL keyspace includes tables considered ineligible for replication, this keyspace cannot be selected in the YugabyteDB Anywhere UI and the database as a whole cannot be replicated.
Note
Even though you could use yb-admin to replicate a subset of tables from a YSQL keyspace, it is not recommended, as it might result in issues due to bootstrapping involving unsupported operations of backup and restore.Because replication is a table-level task, selecting a keyspace adds all its current tables to the xCluster configuration. Any tables created later must be manually added to the xCluster configuration if replication is required.
View, manage, and monitor replication
To view and manage an existing replication, as well as perform monitoring, click the replication name to open the details page shown in the following illustration:
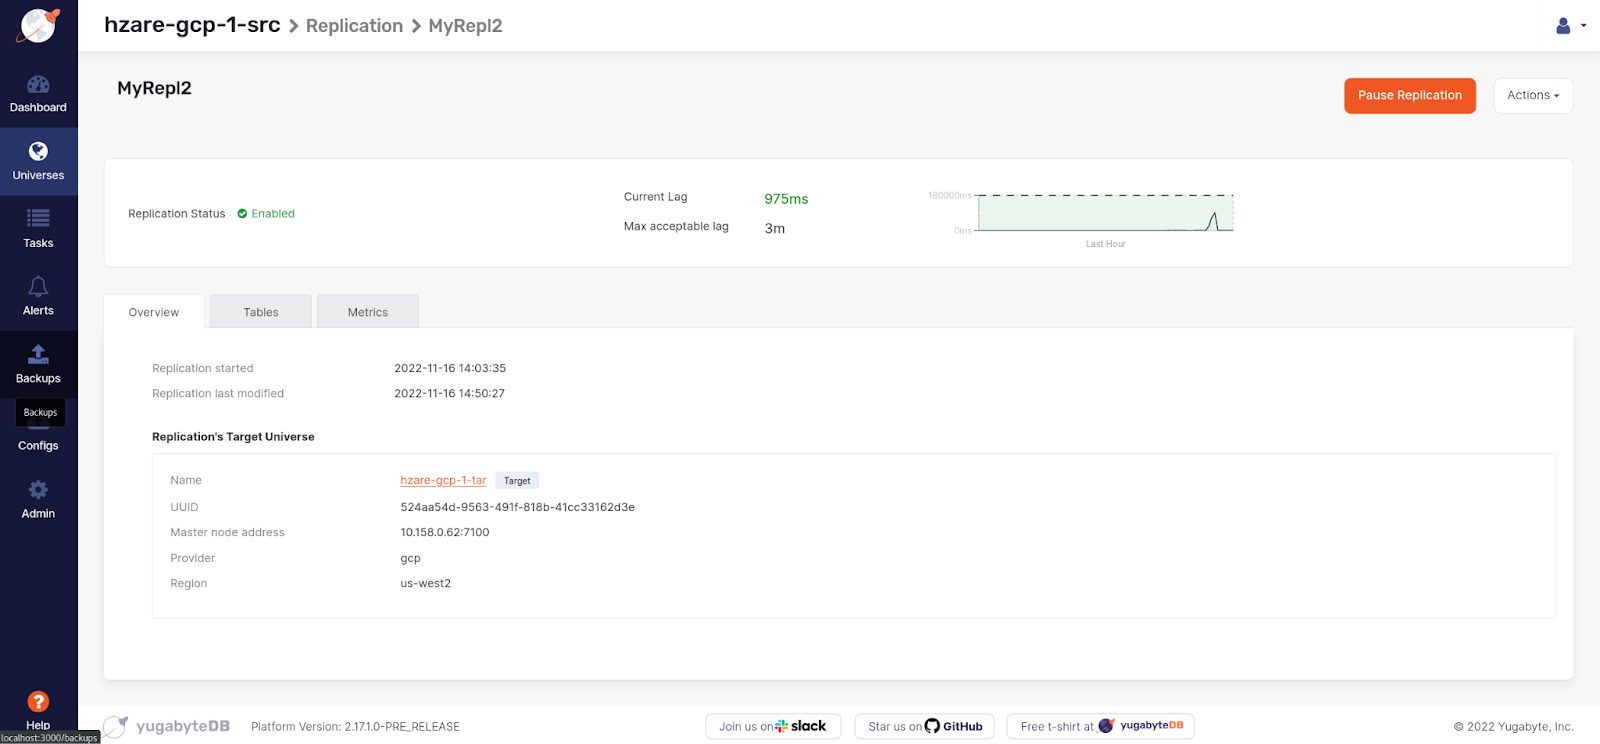
This page allows you to do the following:
-
View the replication details.
-
Pause the replication process (stop the traffic) by clicking Pause Replication. This is helpful when performing maintenance. Paused replications can be resumed from the last checkpoint.
-
Restart the replication by clicking Actions > Restart Replication and using the dialog shown in the following illustration to select the tables or database for which to restart the replication:
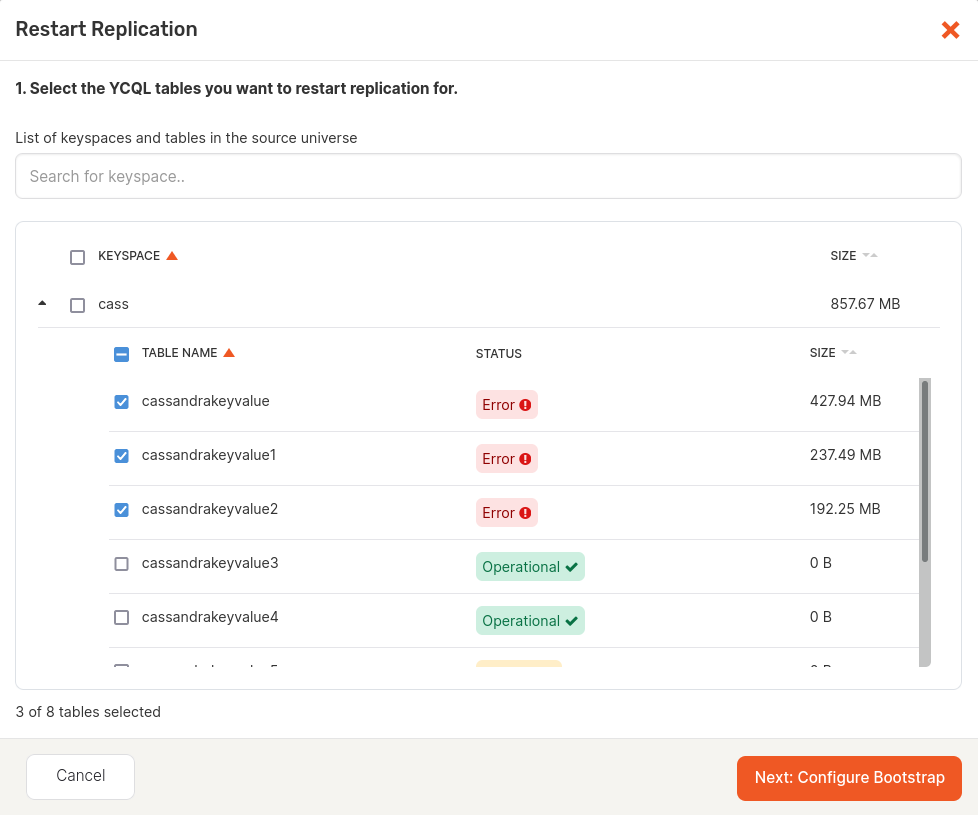
Note that even though index tables are not displayed in the preceding dialog, the replication is automatically restarted for them if it is restarted for the main table.
-
Delete the replication configuration by clicking Actions > Delete Replication.
-
Rename the replication by clicking Actions > Edit Replication Name.
-
View and modify the list of tables included in the replication, as follows:
-
Select Tables.
-
To find out the replication lag for a specific table, click the graph icon corresponding to that table.
-
To check if the replication has been properly configured for a table. If so, the table's status is shown as Operational.
If the replication lag increase beyond maximum acceptable lag defined during the replication setup or the lag is not being reported, the table's status is shown as Warning.
If the replication lag has increased to the extend that the replication cannot continue without bootstrapping of current data, the status is shown as Error: the table's replication stream is broken, and restarting the replication is required for those tables. If a lag alert is enabled on the replication, you are notified when the lag is behind the specified limit, in which case you may open the table on the replication view to check if any of these tables have their replication status as Error.
-
To delete a table from the replication, click ... > Remove Table. This removes both the table and its index tables from replication. If you decide to remove an index table from the replication group, it does not remove its main table from the replication group.
-
To add more tables to the replication, click Add Tables to open the Add Tables to Replication dialog which allows you to make a selection from a list of tables that have not been replicated, and then click Validate Table Selection.
Note that a table with the same name in the same keyspace and with the same schema must exist on the target universe. Otherwise the table is tagged as No Match and cannot be selected. See About the table selection for additional information.
To make the add table operation faster, it is recommended to add new tables to the replication as soon as they are created. When using YSQL, if a subset of tables of a database is already in replication in a configuration, the remaining tables in that database can only be added to the same configuration. Moreover, if adding a YSQL table requires bootstrapping, the other tables in the same database which are already in replication will be removed from replication. The replication will be set up again for all the tables in that database.
-
-
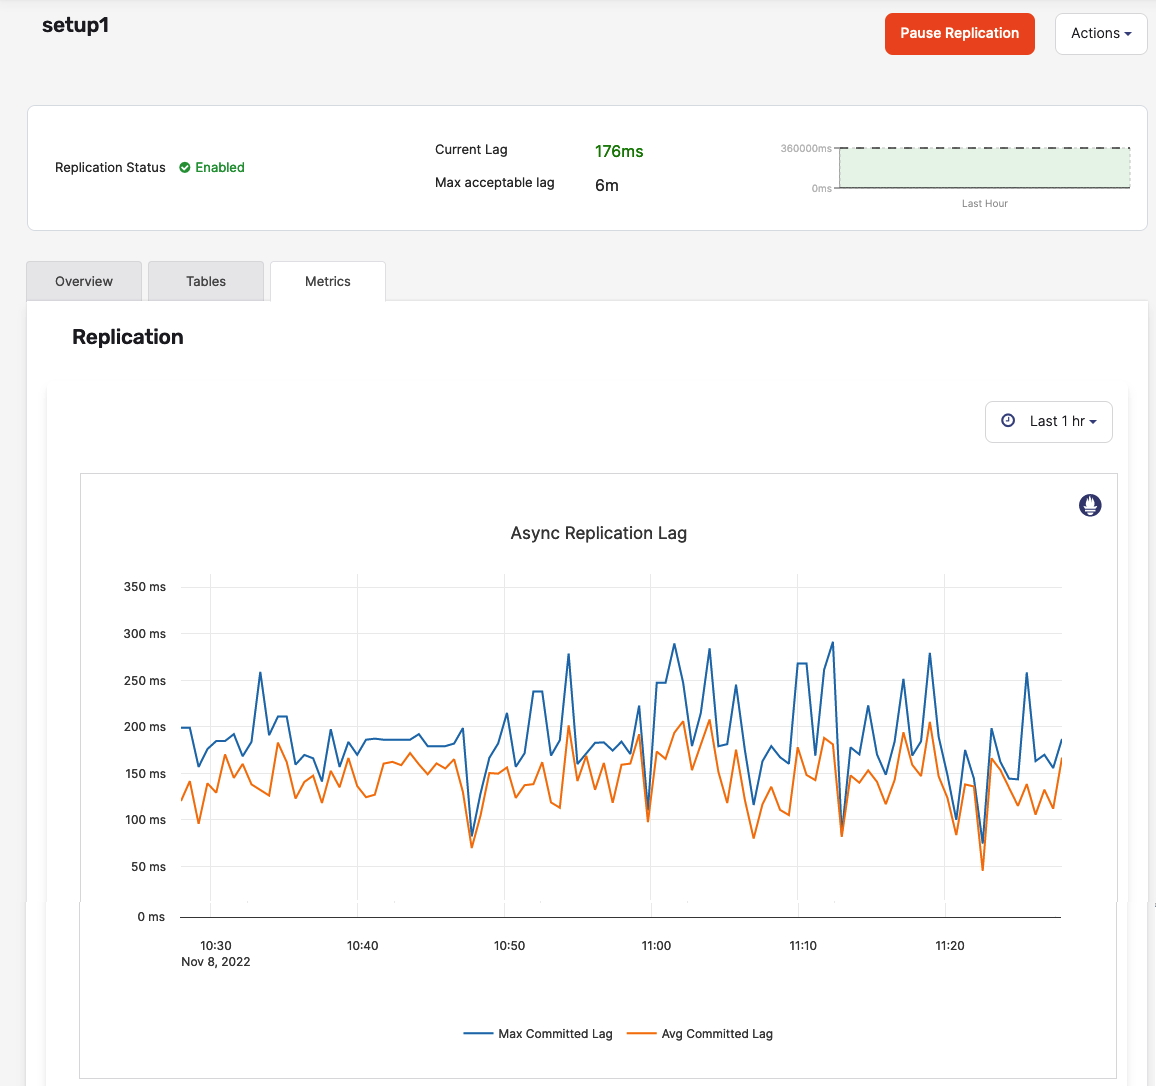
View detailed statistics on the asynchronous replication lag by selecting Metrics, as per the following illustration:
Set up bidirectional replication
You can set up bidirectional replication using either the YugabyteDB Anywhere UI or API by creating two separate replication configurations. Under this scenario, a source universe of the first replication becomes the target universe of the second replication, and vice versa.
Bootstrapping is skipped for tables on the target universe that are already in replication. It means that, while setting up bidirectional replication, bootstrapping can be done in only one direction, that of the first replication configuration. For example, when you set up replication for table t1 from universe u1 to u2, it may go through bootstrapping. However, if you set up replication in the reverse direction, from universe u2 to u1 for table t1, bootstrapping is skipped.
Limitations
The current implementation of xCluster replication in YugabyteDB Anywhere has the following limitations:
- The source and target universes must exist on the same instance of YugabyteDB Anywhere because data needs to be backed up data from the source universe and restored to the target universe.
- The chosen storage configuration for bootstrapping must be accessible from both universes.
- Active-active bidirectional replication is not supported because the backup or restore would wipe out the existing data. This means that bootstrapping can be done only if an xCluster configuration with reverse direction for a table does not exist. It is recommended to set up replication from your active universe to the passive target, and then set up replication for the target to the source universe. To restart a replication with bootstrap, the reverse replication must be deleted.
- The tables with the same name (
database.schema_name.table_namefor YSQL andkeyspace.table_namefor YCQL) and schema must exist on both universes before xCluster replication can be set up. - If you are setting up the replication for YSQL with bootstrapping enabled, you must select all the tables in one database.
- You cannot use the YugabyteDB Anywhere UI to create two separate replication configurations for YSQL, each containing a subset of the database tables.
- The xCluster replication creation process (bootstrapping) is not aborted if the source universe is running out of space. Instead, a warning is displayed notifying that the source universe has less than 100 GB of space remaining. Therefore, you must ensure that there is enough space available on the source universe before attempting to set up the replication. A recommended approach would be to estimate that the available disk space on the source universe is the same as the used disk space.
- Bootstrapping may not work with universes that use encryption-at-rest.
- When using xCluster replication, it is recommended to use the same version of YugabyteDB for both universes. In case of software upgrades, the target universe should be upgraded first.
- If, after setting up xCluster replication, you add a node to the target universe with TLS enabled, you need to manually copy the source universe's root certificate to the added node.
- The xCluster replication creation task might clash with scheduled backups. It is recommended to wait for the scheduled backup to finish, and then restart the replication.